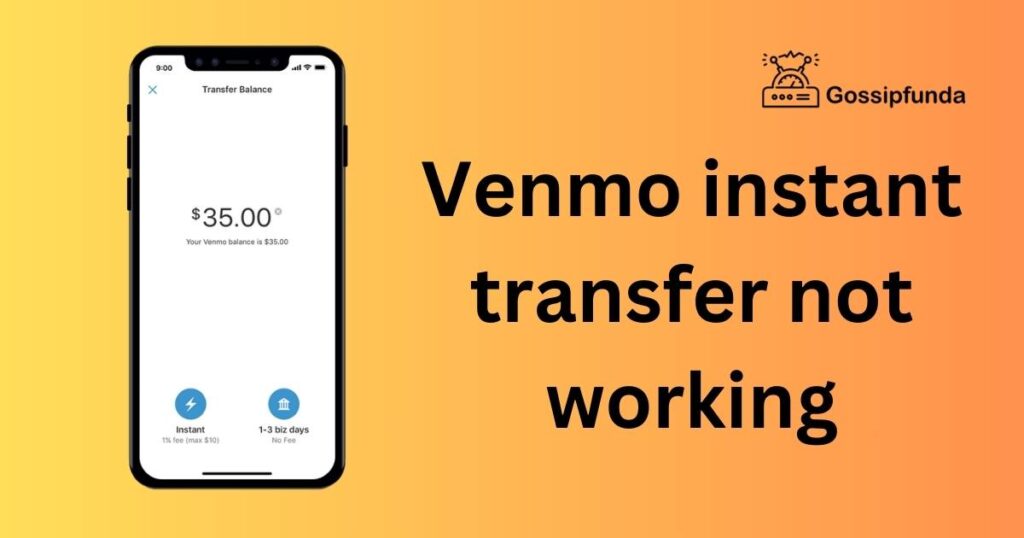
Venmo instant transfer not working
In an era dominated by digital transactions, the need for seamless money transfers is paramount. Venmo, an app acclaimed for its ease and speed in handling peer-to-peer transactions, sometimes puzzles users with issues like the venmo instant transfer not working. With more and more people relying on such platforms to manage their finances, ensuring consistent functionality is indispensable. Imagine being stranded in a scenario where you require instant funds, and suddenly you’re plunged into a dilemma due to a transfer delay. This article endeavors to cast light on some plausible reasons behind this predicament and offer a guiding hand through comprehensive solutions.
Reasons behind Venmo instant transfer not working
Inadequate Account Balance
One of the chief reasons behind the venmo instant transfer not working could be an inadequate account balance. Venmo requires you to have a sufficient balance to facilitate instant transfers, ensuring that the full amount being transferred is available in your account.
Unverified User Account
An unverified user account can often act as a stumbling block. Venmo imposes certain limits on unverified accounts, which might restrict the ability to utilize the instant transfer feature effectively.
Bank Account or Card Issues
Issues related to your bank account or card such as expired cards, incorrect account details, or problems with the bank’s server can cause disruptions in Venmo’s instant transfer service.
Technical Glitches on Venmo
Technical glitches or server issues on Venmo’s end could also be a plausible reason. Sometimes, due to maintenance or unexpected server downtimes, the instant transfer feature might face temporary functionality issues.
User Profile Issues
Ensuring that all personal details in your user profile are accurate and up-to-date is crucial. User profile issues, such as outdated personal information or discrepancies in the data provided, might hinder the process.
Exceeding Transfer Limits
Venmo has established certain transfer limits. If a user exceeds these predefined limits, whether in terms of the amount being transferred or the frequency of transactions, the instant transfer might not be processed successfully.
Issues with the Receiver’s Account
Sometimes, the problem might not originate from the sender’s end. Issues with the receiver’s account, such as restrictions, incomplete profile information, or unverified status, could inhibit the instant transfer process.
Network or Connectivity Problems
Network or connectivity problems can act as invisible barriers. A stable and robust internet connection is pivotal for facilitating smooth and instant transfers on digital platforms like Venmo.
Security Concerns
Venmo employs rigorous security protocols to safeguard user transactions. If any suspicious activity is detected, or if there are security concerns related to a user’s account, Venmo might restrict or delay the instant transfer functionality.
Compatibility with Devices
Lastly, ensuring that your device is compatible with the latest version of the Venmo app is crucial. Sometimes, issues like venmo instant transfer not working may stem from using outdated or unsupported versions of the app.
How to Fix Venmo instant transfer not working?
Fix 1: Rectifying Inadequate Account Balance
Ensuring an adequate balance in your Venmo account is pivotal for successful transactions. Here’s a detailed, step-by-step guide to address the issue of venmo instant transfer not working due to insufficient funds.
Step 1: Check Your Venmo Balance
- Begin by logging into your Venmo account via the mobile app or website.
- Navigate to the “Menu” and select “Settings”.
- Your current Venmo balance will be displayed prominently at the top of the page.
Step 2: Add Money to Your Venmo Balance
- If your balance is lower than the transfer amount, tap on “Manage Balance”.
- Select “Add Money” and input the desired amount you wish to add to your Venmo account.
- Press “Next” and review the information to ensure accuracy.
Step 3: Link and Confirm a Funding Source
- In case you haven’t linked a funding source, navigate to “Settings” and select “Payment Methods”.
- Tap on “Link Bank or Card”, and input the relevant bank or card details.
- Venmo may require you to confirm this new funding source. Follow the on-screen instructions to verify it.
Step 4: Initiate a Transfer
- After ensuring your Venmo balance is sufficient, attempt the instant transfer once again.
- Select the “Pay or Request” option, input the recipient’s details, and specify the amount.
- Opt for “Instant Transfer” and verify all the transaction details before proceeding.
Step 5: Review and Confirm Transaction
- Prior to finalizing the transaction, review all the details meticulously.
- Once assured, click on “Pay” or “Request” to successfully initiate the instant transfer.
Fix 2: Ensuring a Verified User Account
A verified user account is paramount for utilizing Venmo to its fullest, particularly for instant transfers. Ensuring your account is verified can often rectify issues with venmo instant transfer not working.
Step 1: Check Verification Status
- Navigate to “Settings” within your Venmo app or on the website.
- Under “Identity Verification” or similar, check if your account status is verified.
Step 2: Begin the Verification Process
- If your account is not verified, start the verification process by selecting “Verify Identity” or a similar option.
- You’ll be prompted to provide additional information, which may include your legal name, birthdate, address, and Social Security Number (SSN).
Step 3: Upload Required Documents
- Venmo might request you to upload documents to confirm your identity, such as a government-issued ID or SSN card.
- Ensure that the documents are clear, legible, and valid, then upload them through the secure portal.
Step 4: Wait for Verification Confirmation
- Once you’ve submitted all required information and documents, Venmo will review them.
- This process can take a few days. Stay patient and check your email regularly for any updates or additional information requests from Venmo.
Step 5: Attempt the Instant Transfer Again
- After receiving confirmation that your account is verified, try initiating an instant transfer.
- Navigate to “Pay or Request,” enter the recipient’s details, specify the amount, and select “Instant Transfer”.
- Ensure all details are accurate and confirm the transaction.
A verified Venmo account typically allows users to enjoy higher transaction limits and access to all features, including instant transfers. If issues persist post-verification, it may be prudent to explore additional fixes or contact Venmo support for further assistance.
Fix 3: Resolving Bank Account or Card Issues
Bank account or card issues can often act as hurdles in your Venmo instant transfers. Let’s explore a systematic method to identify and resolve these challenges to ensure a smooth transaction experience.
Step 1: Verify Linked Bank or Card Details
- Navigate to “Settings” and then “Payment Methods” in your Venmo account.
- Confirm that all linked bank or card details, such as account number and expiration date, are accurate and up-to-date.
Step 2: Ensure Active Status of Linked Account/Card
- Ensure that your linked bank account is active, and the card (if used) has not expired.
- If your card is expired, remove it by selecting “Remove card” and link a new one by following the prompts to add a new payment method.
Step 3: Check Bank or Card for Sufficient Funds
- Ensure your linked bank account or card has sufficient funds to complete the transfer.
- If funds are low, add necessary funds to your bank account or card before proceeding with the Venmo instant transfer.
Step 4: Confirm Bank’s Server Stability
- Occasionally, issues might stem from your bank’s server being down or experiencing technical issues.
- Confirm the server status by checking your bank’s website or contacting their customer service.
Step 5: Reattempt Venmo Instant Transfer
- Once all bank or card details are confirmed accurate, and servers are running smoothly, retry the Venmo instant transfer.
- Navigate to the transfer option, ensure all details are correct, and initiate the transfer by selecting “Instant”.
Fix 4: Addressing Technical Glitches on Venmo
Encountering technical glitches on Venmo’s platform can be a hiccup, especially for those who rely on venmo instant transfer. Let’s delve into the sequential steps that can assist in troubleshooting and resolving such technical issues.
Step 1: Update the Venmo App
- Ensure your Venmo app is up-to-date by visiting your device’s App Store or Google Play Store.
- Locate Venmo and select “Update” if available to assure you’re utilizing the latest version.
Step 2: Check Venmo Server Status
- Visit online platforms that provide updates on server status, like Downdetector, to check if Venmo is experiencing issues.
- You can also check Venmo’s official social media pages for any updates on server downtimes or technical issues.
Step 3: Restart the Venmo App
- Try closing the Venmo app completely and restarting it.
- On some devices, this may involve swiping it away from your recently used apps or selecting “Close” from the app settings.
Step 4: Reboot Your Device
- Switch off your device completely, wait a few moments, and then reboot it.
- Sometimes, a simple device restart can resolve minor technical glitches or connectivity issues.
Step 5: Reinitiate the Instant Transfer
- After implementing the above steps, attempt the instant transfer again.
- Be meticulous with the recipient’s details and the amount to ensure accuracy before confirming the transaction.
Fix 5: Correcting User Profile Issues
User profile discrepancies can occasionally be a covert cause behind venmo instant transfer not working. Ensuring all profile information is accurate and current is crucial. Here’s a step-by-step guide to reviewing and amending user profile details.
Step 1: Access and Review Profile Information
- Navigate to the “Settings” or “Profile” section within your Venmo account.
- Carefully review all your details, including name, email, and phone number, for accuracy and current relevance.
Step 2: Update Personal Details
- If any information is outdated or incorrect, select “Edit Profile”.
- Update any erroneous details with the correct, current information, ensuring all fields are accurately filled.
Step 3: Confirm Email and Phone Number
- Ensuring your email and phone number are verified is pivotal.
- Check for a verification badge or status beside these details, and if they are not verified, select “Verify” and follow the provided steps.
Step 4: Double-Check Linked Payment Methods
- Under “Settings” and “Payment Methods”, review all linked bank accounts and cards.
- Ensure that all linked methods are valid, and update or remove any that are expired or no longer in use.
Step 5: Attempt an Instant Transfer Again
- With all user profile details verified and updated, try initiating an instant transfer.
- Navigate to the transfer function, input the recipient’s details, define the amount, and select “Instant Transfer”.
- Verify all details and confirm the transaction.
Ensuring all user profile details are not only accurate but also validated can often bypass unseen barriers to Venmo’s instant transfer functionality. Should issues persist post-profile amendment, further investigation into other potential causes or connection with Venmo’s support channels might be necessary to gain additional insights and resolutions.
Fix 6: Navigating Through Exceeding Transfer Limits Issues in Venmo
Venmo enforces certain transfer limits, which, when exceeded, can inadvertently become a reason behind venmo instant transfer not working. Managing your transfers while being mindful of these limits is pivotal, and here is a methodical approach to troubleshoot and navigate through related issues.
Step 1: Review Venmo’s Transfer Limits
- Visit Venmo’s official website or access the “Help” section within the app to understand the set transfer limits for verified and unverified accounts.
- Be aware of both sending and receiving limits, as they might vary.
Step 2: Analyze Recent Transfer History
- Navigate to the “Transactions” tab within your Venmo account to review your recent transfer history.
- Sum up the total amounts of transactions to assess whether you have exceeded the weekly or monthly limits.
Step 3: Adjust Transfer Amounts Accordingly
- Based on your findings, adjust the amount you intend to transfer instantly, ensuring it adheres to Venmo’s stipulated limits.
- If required, consider breaking the transfer into smaller amounts spread over a longer duration to comply with the limits.
Step 4: Wait for the Reset of Transfer Limit
- If you’ve reached the maximum limit, you will need to wait for the limit to reset, which typically happens on a rolling weekly or monthly basis.
- Plan future transactions to prevent hitting the maximum limit, thereby avoiding potential delays.
Step 5: Initiate Instant Transfer Again
- Once ensured that your transaction amount is within Venmo’s allowable limits, attempt the instant transfer again.
- Carefully verify all payment details, select “Instant Transfer”, and affirm the transaction after thorough review.
Strategizing and being cognizant of your transaction history and Venmo’s imposed limits facilitate smoother and uninterrupted instant transfers. If challenges prevail despite adherence to transfer limits, further examination of other fixes or connecting with Venmo’s customer service might be necessary to decode and resolve the persisting issue.
Fix 7: Rectifying Recipient Details
An overlooked yet crucial aspect of ensuring a successful Venmo instant transfer is the precise input of recipient details. Missteps here can halt transactions, rendering the venmo instant transfer not working. Let’s work through a systematic approach to confirm and rectify recipient details for seamless transfers.
Step 1: Validate Recipient Username
- Go to your Venmo transaction page and verify that the recipient’s username is spelled correctly, with accurate characters and without any extra spaces.
Step 2: Confirm Recipient’s Registered Phone Number or Email
- Besides the username, ensure the recipient’s registered email or phone number on Venmo is valid and current.
- Double-check for any typos or errors in these details before initiating a transfer.
Step 3: Communicate with the Recipient
- Engage in a dialogue with the recipient to affirm their Venmo account details.
- Cross-verify the provided details with what you have to circumvent sending funds to an incorrect account.
Step 4: Initiate a Smaller Test Transfer
- Consider sending a nominal amount as a test transfer to the recipient.
- Request the recipient to confirm receipt, ensuring the funds are being directed to the correct account.
Step 5: Execute the Intended Instant Transfer
- With the recipient details verified and a successful test transfer, proceed to make the intended instant transfer.
- Confirm the amount and select “Instant Transfer”, reviewing all details once more before finalizing the transaction.
Fix 8: Revisiting Transaction History and Canceled Transactions
An unexplained failure of venmo instant transfer may sometimes stem from unnoticed transaction glitches or unintentionally canceled transactions. Delving into your transaction history and discerning potential issues therein is pivotal in resolving these cryptic challenges.
Step 1: Peruse Your Transaction History
- Navigate to the “Transaction History” or relevant section within your Venmo app.
- Scrutinize recent transactions, focusing on statuses and comments.
Step 2: Identify Canceled or Failed Transactions
- Look out for any transactions labeled as “Canceled”, “Failed”, or similar within your history.
- Note down specifics of these transactions for future reference and analysis.
Step 3: Understand Reasons Behind Cancellation or Failure
- Visit the detailed view of the canceled or failed transaction. Sometimes Venmo provides reasons or error messages explaining the halt.
- Understand the communicated reasons, as this information is instrumental in preventing recurrence.
Step 4: Rectify Identified Issues
- Based on the reasons provided or identified issues, take corrective measures.
- This could involve updating payment methods, communicating with recipients, or modifying transaction amounts.
Step 5: Retry the Venmo Instant Transfer
- With identified issues rectified, navigate back to perform the instant transfer.
- Verify recipient details, validate the amount, select “Instant Transfer”, and finalize the transaction after a thorough review.
Conclusion
Navigating through the digital financial world can sometimes be a maze, especially when encountering issues like venmo instant transfer not working. By understanding the potential reasons and adopting a structured approach towards troubleshooting, users can ensure that their digital transactions remain unhindered. From verifying user details, ensuring stable internet connectivity, and being cognizant of possible server issues to exploring alternative transfer methods, individuals can navigate through the Venmo platform with augmented confidence and ease. Remember, in a digitized world, knowledge and preparedness are your best allies in ensuring seamless transactions.
FAQs
A myriad of reasons, such as bank issues, technical glitches, or incorrect user details, can potentially disrupt instant transfers.
You can check Venmo’s server status on their official social media pages or via server status websites like Downdetector.
Yes, Venmo imposes transfer limits, which vary based on your account’s verification status and your usage history.