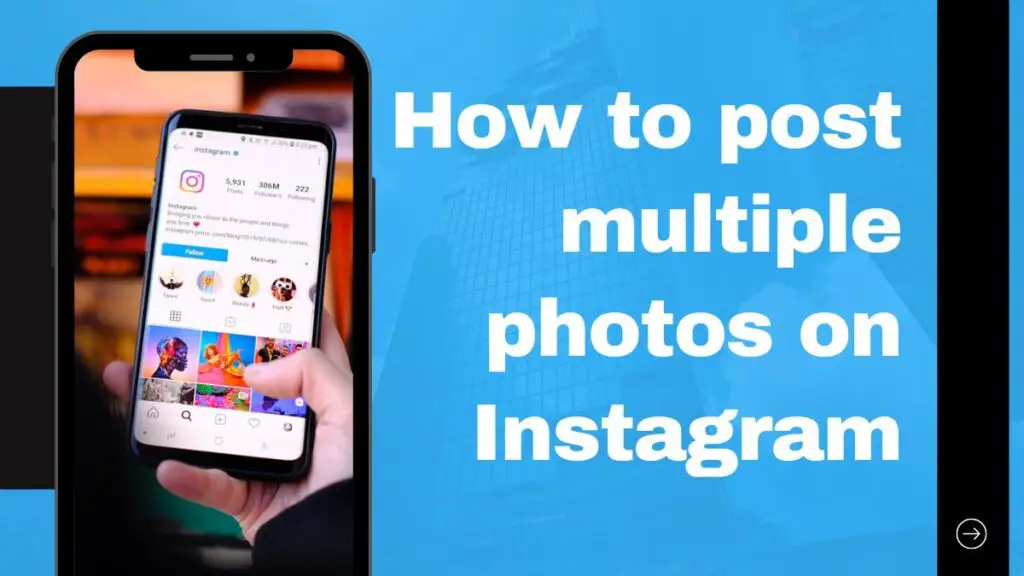
How to post multiple photos on Instagram
Instagram is a distinct social media site which has become extremely popular by millions of people. It’s among the fastest-growing elements of online marketing and we all acknowledge that it’s an amazing platform. There are many methods to post multiple pictures on Instagram depending on your goals.
You’ve sent a message personal to someone via Instagram and have had follow-up questions. You’ve shared your company information with someone who posted a comment on your post. What’s next? You’re ready to upload that picture you’ve always wanted to share! It’s much more difficult than you imagine. This guide will show you how to publish multiple images at the same time on Instagram and how to prevent spamming your posts to appear natural.
Instagram is an excellent opportunity to connect with other like-minded individuals, interact with followers and build your followers, all within the context of engaging interesting and informative content. How do you make the most of Instagram? The short answer is by sharing multiple images on Instagram.
How do I upload multiple images on Instagram
If you’d like to upload several photos to your Instagram account There are many options to accomplish it. You can, for instance, make use of using the “Paint” function in the camera app on your tablet or phone. It is also possible to make use of a third-party application that lets you post multiple images on the Instagram account.
- Open the camera app on your device, and snap an image of what you’d like to publish on Instagram.
- Click “Paint” from the options menu on the lower right of your screen. Then choose one of the following choices: Add New Image and Add Location or Tag. These options let you include one or more pictures to an existing post and add one or more images as if taken in a particular location (such as the restaurant) or tag the person in your existing post with their username.
- After selecting the number of photos you’d like to add to your existing post, click “Done.” The new images will be added alongside any photos within the article!
How do I upload multiple images on Instagram
If you’re looking for a way to upload many images on Instagram then you’re at the right spot! This is how you can do it:
- Then, go to the picture you want to include. If it’s not yet there, click on the camera icon located in the lower right corner of your screen. Take either a photo or video.
- Then, tap the icon that resembles an X that has three rows (at at the bottom of every line). This will display an option to choose which images from your library you want to be included in this article. Select which photos you’d like to add by tapping them separately or pressing “Select All” if you wish to add all of them simultaneously!
- Once all photos have been selected When all photos are selected, select “Add Photos.” The new photo will be displayed.
Appear in your post, and will appear in the post and appear under “Instagram Photos” when viewing it on your feed!
What’s the advantages of posting multiple images Instagram?
The advantage of sharing multiple images Instagram is that the benefit of posting multiple photos Instagram can be that it allows you more freedom of creativity. It’s not necessary to choose between the two options; you can upload all of them! It also allows you to display your work in various ways, and utilize hashtags to help readers locate your postings.
Instagram is the ideal platform to post your daily life. It’s a fantastic opportunity to show your your family and friends what you’re doing, as well as a good source of the inspiration you need for your work.
What if you wish to show more than one picture? Perhaps you’re planning a trip overseas, or you’re looking to add a little more depth to your photo. No worries–we’ve got your back. Here are some helpful tips on how to share several images on Instagram:
- Make use of a tripod or similar when taking photos in different places. This will ensure that your photos are well lit and clear with no blurring and other problems that might spoil the image.
- After you’ve completed all your photos, head over and upload them to Instagram to let them be shared and uploaded to the world!
This means that you can simply take one photo then upload the image to Instagram for as many times as you want! If you’re hiking in the woods, snapping various perspectives of the same subject is the perfect opportunity to show your family and friends exactly what you’re experiencing.
However, if you’d like to be more imaginative There’s no reason to limit yourself to one picture. You could upload five pictures for each post! If you notice something that’s interesting while out hiking (like the tree below) or would like to showcase an entirely different perspective of the same tree, then go to upload those 3rd and 4th photos, too!
This can be particularly helpful for sharing videos on Instagram too. Instead of recording one video with your phone and uploading it using the built-in camera app for iOS Why not make multiple videos with your smartphone? So, you’ll have additional options to choose how your viewers can experience what amazing thing that happened being out in the wild in the present.
How do you make sure your images get noticed by fans
Everyone has been through it. You take a fantastic photo You think it’s great but you see… you’re left with nothing. Nobody ever looks at your image. What would you think if I said that there was an opportunity to ensure that the eyes of your followers were fixed on your image? What if I told that doing this would lead to an increase in followers, greater engagement and even more money?
It’s true! It’s also really simple! Here’s howto:
- Make sure your photographs are properly lit. When the sun’s position is either behind or directly in front of you or somewhere between these two positions the photo is likely to be less luminous than it should be and won’t receive the amount of light it is required to be perceived by viewers. The best way to avoid this is to take photos at different times of the day where there isn’t a lot of illumination around.
- Check that all the images you take are clear to the eye. That means no shadows over objects, even if they’re in focus. Also, there shouldn’t be any weird angles that make things appear more close than they actually should be (like two people standing side-by side). If there’s a problem, it’s not.
There are plenty of ways to have your pictures taken notice of by the people who are concerned about your. Here are some guidelines to make sure this you get noticed:
- Do not be afraid to use hashtags. They’re the quickest method of getting your blog posts noticed by new users!
- If you’re using accounts on social media ensure that you’re following other accounts related to the work you do. For instance, if you’re an artist, then follow artists who paint or draw. If you’re in the tech field, follow other companies that deal with technology. It’s helpful to know the work of other companies as well!
- Don’t be scared to share photos or videos that have different lighting or angles from the original picture. It’s a chance for your fans to view something different!
- If you’d like to get more people to view your pictures, tag your photos with keywords such as “travel,” “outdoors,” “fitness” etc. They’ll appear in search results that relate to these topics when someone searches for something that is related to the topic.
How can you get the most out of multiple posts on Instagram
The best method to make the most out of posting many images on Instagram is to apply filters. By adding a filter that makes your images appear as if they were taken at an alternate time or location can help you distinguish yourself from the rest and attract more followers.
If you’re searching for an easy method for your Instagram images appear like something from an old storybook, consider adding some of the filters below:
1) Vintage Photo
This filter can make your photos appear as if it was captured at a different time and in a different location. The filter can be found on the camera tab of the app or download it directly from the site.
2) Landscape Photo
The photo appears to have been taken using an old-fashioned camera by an individual who’s never had an iPhone before , but enjoys snapping photos nonetheless! The app also has an option within “camera section” of the app as well as on the site. The saying goes: “a picture is worth a thousand words.” But, we’re here disprove that absolutely.
If you’re looking to communicate your message it’s best to write the power of a thousand words rather than just one image. Yes, there are instances where you can post pictures of your pet or cat (you are aware that they love staring at their reflections! )–but with regards to posting multiple pictures on Instagram? No. No, no, no!
Here are some ways to ensure your posts are given the greatest reach you can get:
- More than once per each day. The most effective way to grab people’s attention is to publish fresh content each day. If you only update every week, people will stop looking at your feed as they realize there is nothing new in there!
- Upload videos instead of photos! Videos are more appealing visually than photos, and people are awestruck by videos. They can also be used as a way to boost product advertising! Consider what kind of content could be appealing to your target audience? And then send it out to them!
- Post content from other users and your own! This is a great option for taking a trip, or simply looking to showcase your new clothes, Instagram is the perfect platform to share many images. But how can you ensure that every photo gets the most response?
It is the first thing to do to choose an appropriate theme for your gallery. The most effective general rule is to select a theme that’s easy to understand, like “the snow” or “the beach.” So, when you click on an image within your gallery you’ll allow them to look through all the photos relevant to their interests all in one location.
If you’re uploading multiple images from one place, consider applying different filters to each group of images. So, every group stands out and is noticed by those who are interested in viewing the photos together.
Another method to ensure that your gallery looks cohesive is to select an appropriate background color to match your other photos. For instance, if you’re posting images from an outdoor event and some from a night at the beach, select an appropriate background color such as green or blue so that they appear similar, while keeping their individuality.
How can you ensure that the images are of good quality? ?
To find out if the images are of high quality, you have to be aware of the methods to verify the quality of the photo. The following article will guide you with this.
- Then, download or all of these photo-editing software for your device or computer , and begin editing your photos using the application.
- Then, you can open another application to edit your photos and any other software that lets you edit your photos and enhance the way they look than they did when they first were.
- After you have launched the application, select “file” and then click on “save,” which will save the file as an image file on your device or computer.
- Then, take out your computer or phone and open that image file once more to see the image prior to and following editing!
It is the first thing to acquire an excellent camera. This is crucial as it will enable you to capture better quality photos from the beginning and will also mean you can capture more images at a time and you won’t have to be spending many hours editing them! It is also important to have good lighting to increase the overall quality of your pictures more.
The next step is to be aware of how to edit images. There are numerous ways to accomplish this However, here are some suggestions:
- The Lightroom (free) It lets you adjust sharpness, contrast, colors and so on. It offers a number of wonderful features like the ability to change the brightness or darkness the photo appears to be on a computer’s screen, which means there’s no requirement for additional software such as Photoshop and GIMP! There are also tons of filters that can assist when editing images!
- Photoshop (paid) The program lets you perform all of the tasks previously mentioned and more! It lets you use tools such as adjustment layers that allow you to modify one thing
How can you make an appealing Instagram post using multiple images? ?
Instagram is the perfect platform to share your story. It’s an excellent opportunity to meet people who appreciate the things you’re working on as well as a the chance to show off your artistic side. However, sometimes, Instagram posts can feel as if they’re lacking something. You want to highlight the effort you’ve done to get to that point of your life. But how do you create the post to get the message through?
So, we’ve got you back! This article will offer some ideas on how to create an appealing Instagram post using multiple photos. If you’re trying to create an appealing Instagram post, it’s recommended to utilize multiple photos and captions. The more pictures you can have of your item or service the more appealing. If you’re looking to get imaginative with your captions, you’re even more creative!
There are a myriad of strategies for making your posts appealing and text-heavy. For instance, you can utilize bullet points and bold text to make titles rather than just using numbers. It is also possible to include the name of your service or product in the event that it fits the article.
- First, locate a spot where you can take amazing photographs of!
- Make sure you take a variety of photos! Find different angles and backgrounds. Make sure that all your photos are of high quality.
- After you’ve finished taking pictures edit them using your preferred app (we suggest Snapseed and Adobe Photoshop) to make your photos look stunning!
Add a caption , and any other personal details, then select to share
I’m currently in the middle of an exciting adventure at the moment. I’m sitting in a van travelling through the nation with my loved ones. It’s been a while since I’ve left my hometown and this journey was filled with unexpected experiences.
The first shock was discovering the fact that mom agreed to drive us. She just got her license at 62, and I was unsure of how she would manage it. But she was great! We’re all looking forward to making our way across the country with her and it’s been a fun so far!
I’ve also discovered about my Dad’s piloting experience which is quite awesome. He’s been teaching us interesting details about flying. He even took us in his plane for an adventure in the area when we reached Our destination of choice: Las Vegas!
We’re looking forward to many more adventures when we journey throughout America together! Here’s the final version of the caption I wrote. I hope you like it! It’s the most beautiful caption I’ve ever done, and I’m happy to be sharing it with the world.
If you’re a huge fan of Instagram The best thing about the application is that you can create captions for your pictures. However, not every caption can come up with something as original and personal as you’d like to be!
The process of adding captions is straightforward you just need to select the image of your phone’s camera roll, then tap the share icon at the lower-right corner of your screen (it appears like a person who has two eyes as well as a mouth that is open). Select “Add Caption.” You’ll be given the option to select the caption you want to use and then click “Done.” After choosing the caption, you’ll be able to include any other personal details (like hashtags) before selecting to share the photo.
- Create a caption for your photo using Text editor. Make sure you’re making use of the dark-colored mode otherwise it’s difficult to read what you’re writing.
- After you’re done, tap the text field , and then select “Share.”
Summary: It is possible to are able to upload multiple images in one post by uploading them all at the same simultaneously.
The sharing of multiple photos in one blog post is a great way to showcase the highlights of your trip. If you’re planning an intimate getaway with your spouse or simply enjoying some time with your family and friends posting multiple photos can make your blog stand out.
to share several images on one page:
- Upload all the photos all at once (don’t worry about if they’re 100% perfect–we’ll crop them all in one go)
- Include captions for each image when you upload them, to ensure that we give each photo a unique title.
- Make sure all images are located in the same folder before clicking “Upload”
It’s happened to us all. At a party, you get a request for a photo with you, but the time is a blur and you’re eager to go back to the celebration. So, what should you do?
There are two options available to upload a single image at a moment or upload as many images as possible in one post. The first method takes more time and is more time-consuming than the alternative of that allows you to upload multiple photos within one blog post. However, if you select the latteroption, it’s possible to upload multiple photos within one posting. Uploading multiple images on the same Instagram post is easy. All you need complete is post them all at the same at the same time.
It means that you could snap a lot of pictures on your phone and upload them all at once to the form of an Instagram post. Then, you’re done! You’ll be able to share a photo with your most beloved acquaintances, or the last excursion to the beach on Saturday or whatever else you’d like to be able to share with the world.
Conclusion
Of course, there’s no correct or incorrect way to share multiple images on Instagram. There’s a standard approach that involves a little of editing using the tools built into your smartphone. Another option is to share your photos using the post from scratch, however it limits you to only one photo per post. Both options let you to show multiple photos in your frame photos prior to posting.
It’s been an enjoyable day at the beach, a tasty dinner with your friends or a wonderful weekend with your beloved. And you don’t know what to do with all these pictures you’ve always wanted to share. Here’s a few reasons to upload them to Instagram 1. It’s easy. 2. It’s obvious who took the photo since they will only appear when you log into your Instagram account. 3. It will attract more visitors to your website since they will be able to observe what you enjoy doing during your spare time. 4. It’s just plain fun!
Instagram posts are restricted to showing only one image at one time. Of course, you can create a collection of pictures and then manually choose the one you want to share however you’ll come into the problem of spending long periods of time looking at the camera’s viewfinder as opposed to. seeing the actual world surrounding you.
Perhaps, you’ve found an innovative method of sharing multiple photos on Instagram. If you’ve got any suggestions, or have any questions about mine, do contact me in the comments section below.