Odin NAND Erase | What is NAND for Android phones? | How to erase it?
Hello folks and welcome back to Gossipfunda.com. I am back with another one of my tech-related articles that might just prove immensely helpful to you. In this article, we’ll take a look at one of the familiar tools called Odin. In the past, we’ve used Odin for customizing our Android smartphones by installing custom or stock firmware images. But Odin is not only used for flashing firmware, it is used for much more than that. It can help you to fix your non-functional galaxy device. For this article, however, we’ll be taking a look at the Odin NAND Erase option present in the software. As usual, we’ll be going into every tiny detail of this option and the software Odin.
Odin NAND Erase
If you’ve found yourself reading this article then something must have gone wrong with your phone, or you’re just reading for general knowledge. Either way, you won’t be disappointed because we’ll be covering every little detail concerned with the NAND Erase option. We’ll also be talking in-depth about the utility software Odin, which provides us the option to erase NAND in the first place. We’ll also cover tutorials on how to perform a NAND Erase using Odin and also how to fix an unintentional NAND Erase. But before all that, it’s important to get to know the software in use and its developers a little bit.
Don’t miss: Android Apps Keep Crashing
Samsung Electronics
The South Korean conglomerate developed the Odin utility software to aid in the development of the Samsung Galaxy Smartphone line. Established in 1969, Samsung Electronics has its headquartered in Suwon. With accounting for more than 70% of its parent conglomerate’s total revenue, it is the pinnacle of Samsung chaebol. Majorly owned by foreign investors, Samsung Electronics has its assembly plants in around 74 countries.
Apart from being the major manufacturer of products likes Smartphones, Tablets, Smart Televisions, Smart Fridge, etc. Samsung is also the lead manufacturer of electronic components such as batteries and such for clients like Apple, Sony, etc.
Samsung Electronics arguably rose to fame because of their smartphone line which came to be known as Samsung Galaxy. Due to their unique looks and fast processors, they are still considered high-end smartphones often finding competition with Apple products. Most Android smartphones use the Android operating system with Samsung’s custom UI known as One UI.
Aside from smartphones, Samsung has also started Galaxy Tab and Galaxy Note lineups which have found a great amount of success. In addition to these, Samsung also manufactures smartwatches and activity trackers called, Galaxy Gear and Galaxy Fit respectively.
Samsung Electronics is also one of the most innovative smartphones company’s in the world. In 2019, it unveiled the Samsung Galaxy Fold, an Android-based foldable smartphone. In addition to this Samsung has also released the Galaxy Z series, which is again one of the industries’ first foldable and flippable smartphones.
Samsung also released a Windows 10 based Galaxy Tablet known as Galaxy Pro S. Currently the market capitalization of Samsung Electronics stands at more than US$ 500 billion, making it the 12th biggest company in the world by revenue. Samsung Electronics at the time of writing has a three CEO structure along with a separate CEO for Southeast Asia.
Odin
The utility software was developed and released by Samsung Electronics. It is used by thousands of people including Samsung’s own service centers for fixing non-functional Samsung devices. But not using the software properly could also brick your phone. We’ve also used and made tutorials on using Odin on this site. We’ve covered how to flash custom or stock ROMs using Odin. Odin also has additional features like:
- Flash Recovery files, also known as TWRP.
- Next, Flash Kernels.
- Flash custom root packages.
- Odin also allows users for performing a one-click root on their Galaxy devices.
Using Odin can be incredibly risky without proper guidance. Hence it’s very important to make a backup for all your data before doing anything with Odin.
NAND
Those familiar with Mathematics or Physics must remember the name NAND from these subjects. NAND is a type of Binary operator abbreviation. It stands for Not AND or the negation of the AND operator.
On Android OS, NAND is a non-volatile memory that stores crucial OS data even when the android phone is turned off. The NAND memory stores multiple partitions in it like boot, kernel, recovery, system, etc.
Thus doing a NAND Erase removes all of these files and leaves your smartphone without an OS or in other words a brick.
Creating Backups
It is highly advised to create backups before proceeding with NAND Erase as the process involves wiping all data from your smartphone. Let’s see how you can create a backup of the important stuff from your phone.
- Download the app Super Backup from the Play Store.
- After it has been installed properly, grant the app the necessary permissions for it to work properly.
- For backing up all your SMS, tap the SMS button and select Backup All. This will create an XML file in the folder SmsContactsBackup
- The process is the same for Contacts and Call Logs too. Backing up Contacts generates a VCF file and Call Logs creates an XML file in the same folder.
- Copy the entire folder and keep it somewhere safe on your PC.
- After the Firmware Flash copy the folder back to the Home directory of your storage and install the Super Backup app again.
- Tap the option you want to restore and press Restore. Select the desired file and press OK.
The files will be restored.
Performing Odin NAND Erase without Re-Partitioning
Do this at your own risk. Performing a NAND Erase will leave your phone without an OS. This can’t be fixed without the appropriate PIT file.
For this process, we’ll be using the Frija software made by wssyncmldm. The software was created as a companion for Odin for downloading Galaxy firmware images directly from the Samsung FUS (Firmware Update Server). We’ll also be using Odin, developed by Samsung electronics for performing the firmware flash with NAND Erase.
- First of all, you need to download the correct firmware image for your smartphone. For this process, you can use an app like Frija, here.
- Unzip the downloaded file.
- With your Samsung Phone connected to the PC, launch the Frija.exe file.
- On Auto mode, Frija will detect the Phone Model and the CSC automatically. Else, you will have to put it manually.
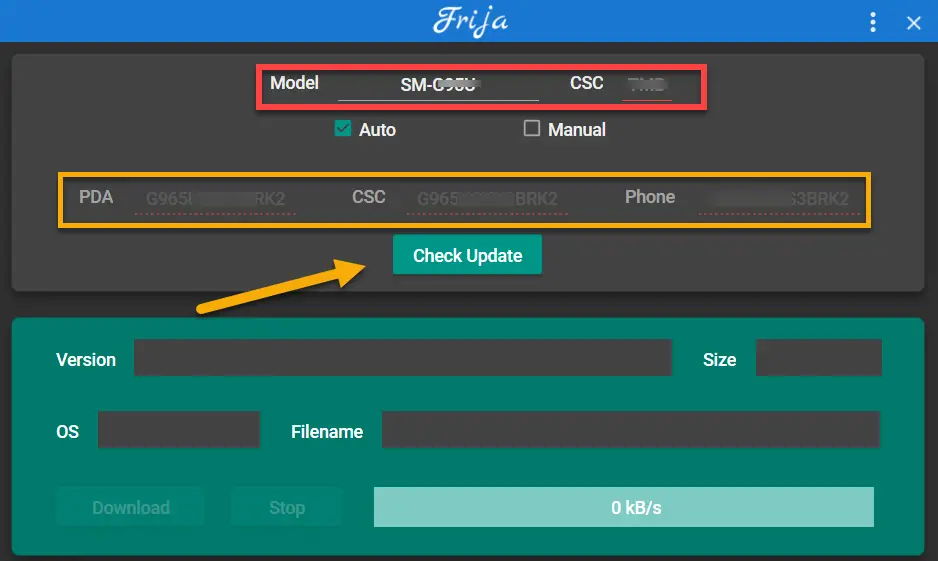
- After entering the required information, click Check Update.
- This will give you the latest version of the firmware for your Galaxy phone which you can download using the Download button.
- Now, with the right firmware downloaded and unzipped, make sure you have five files in the folder. Each should start with BL, AP, CP, CSC, and HOME_CSC.
- Download Odin tool with the latest version of Odin. Unzip the file and launch Odin.
- Populating Odin is always straightforward, the BL file goes in the BL slot, AP into AP, CP into CP, and the CSC file go into the CSC slot.
- HOME-CSC file is supposed to a firmware flash without wiping anything. You can try it at your own risk since I’ve never tried using it before.
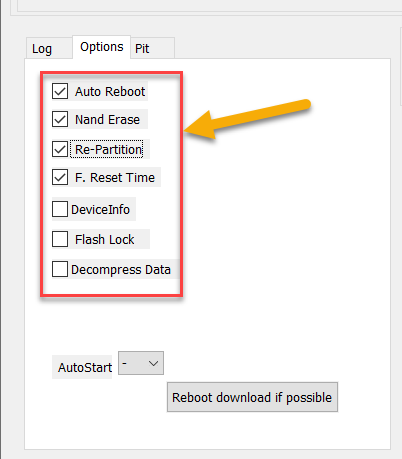
- Go to the Options tab and enable the NAND Erase checkmark.
- With all things set, you now need to boot into download mode.
- On different devices, it’s a different combination of buttons. Specifically, on the Galaxy S9, you can enter the Download Mode by simply pressing the Bixby button, the Power Key, and the Volume Down button at the same time with the smartphone turned off.
- On older models with Home Button, it takes the Home button, Power button, and Volume Down button at the same time.
- You will see the Added message on Odin when it detects your smartphone.
- Now you are ready to perform a NAND Erase.
This will remove the NAND partitions from your smartphone. To fix it you need to re-partition the NAND and flash the firmware with the appropriate PIT file.
Re-Partitioning and Odin NAND Erase
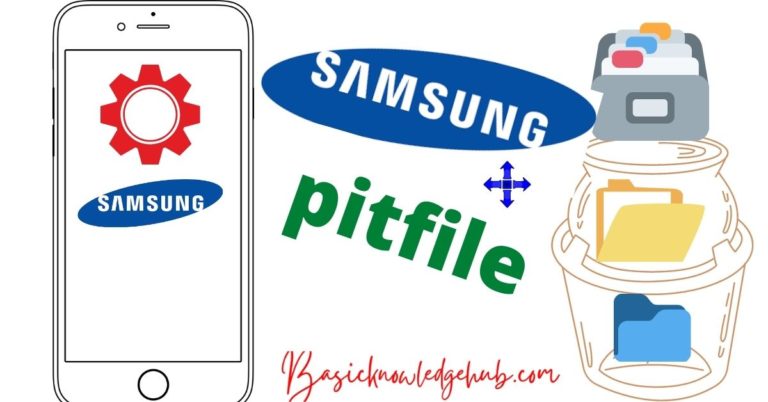
Proper NAND Erase requires you to get the PIT (Partition Information Table) file and perform a re-partition along with NAND Erase. Re-partitioning will create the same partitions in your NAND again so that your smartphone has the required files after the NAND erase. PIT files contain the information required by Odin to perform re-partitioning.
- This method requires you to use the appropriate PIT file for your particular smartphone. A Partition Information Table File contains all the information about the partitioning of the NAND for that particular Android phone.
- In order to get the PIT file, you need to extract the CSC file in your firmware.
- Make sure you have Show File Extensions enabled in Windows Explorer. Now rename the file by selecting the file and pressing F2.
- Add .zip extension to the end of the file and extract it just like a normal archive.
- Enter the unzipped folder. There should be only one file with the .PIT extension.
- Now in Odin go to the PIT tab. Press OK on the warning.

- Press on the PIT button and browse to the PIT file you just unzipped.
- Now go to the Options tab in Odin and make sure these options are enabled: Re-Partition, Auto-Reboot, NAND Erase, and F. Reset Time.
- With everything set, press the Start button.
- If everything goes alright you should get a “PASS!” message at the end.
There you go, you have now successfully performed a NAND Erase with proper re-partitioning by using the PIT file for your smartphone.
Conclusion
With this, we’ve come to the end of this article. Today we discussed everything about the NAND Erase option present in the popular utility software Odin. We took a look at the summary of Samsung Electronics, the developers of Odin, and manufacturers of all Galaxy devices. Also, We learned how to create and restore backups before performing a firmware flash. We then discussed in detail how to perform a NAND Erase firmware flash with and without re-partitioning.
If you liked this article, please do share it with your friends and family.
Stay Safe out there and hope to see you again.