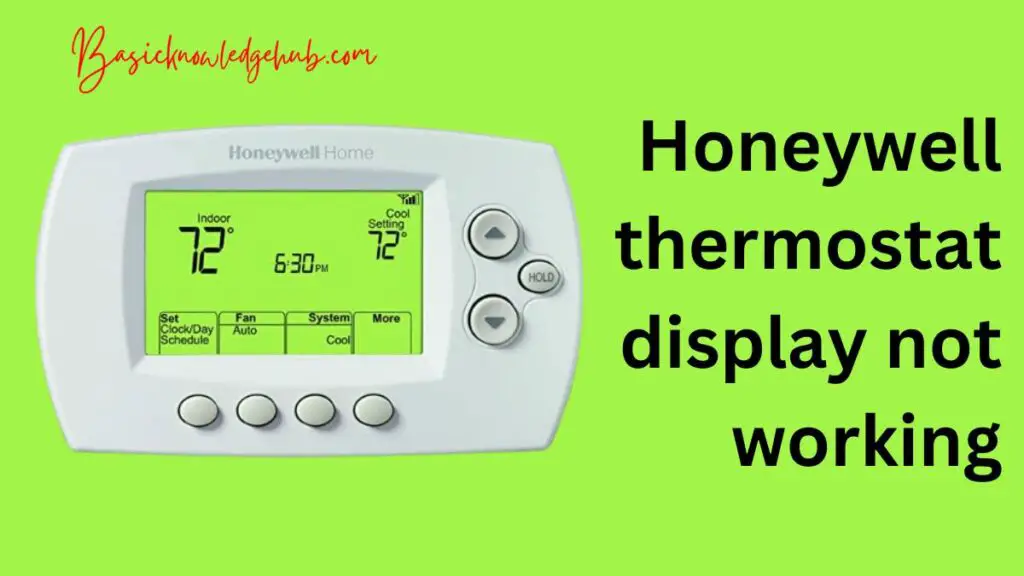
Honeywell thermostat display not working
One of the most popular home automation products, the Honeywell thermostat, can sometimes throw homeowners for a loop when its display suddenly goes blank. Nothing feels as concerning as being unable to access or change your home’s temperature settings, especially during extreme weather conditions. If you’ve ever thought, “Why is my Honeywell thermostat display not working?” you’re not alone. Let’s explore some common reasons for this issue and walk you through the steps to get your device back up and running.
Reasons behind Honeywell Thermostat display not working
- Power Issues: The thermostat might not be receiving adequate power. This could be due to drained batteries, especially in battery-powered models, or issues related to hard-wired connections such as tripped circuit breakers or faulty wiring.
- Screen Lock: Some advanced Honeywell thermostats come with a screen lock feature for security. If activated, this can prevent the display from showing the settings.
- Internal Software Glitches: Just like any other electronic device, thermostats can experience software glitches. This might lead to unresponsive screens or blank displays.
- Dirt and Debris: Over time, the accumulation of dust and debris inside the thermostat can hinder its functionality, leading to display issues.
- Temperature Settings: In some models, the screen might turn off after certain periods of inactivity. It might seem like a malfunction but could be due to sleep settings.
- Thermostat Age: With prolonged use, wear and tear can affect the thermostat’s performance. An aging thermostat may have a fading or non-responsive display.
How to fix Honeywell thermostat display not working?
Fix 1: Power Issues
When dealing with a Honeywell thermostat whose display isn’t working, the first area to look into is potential power issues. Here’s a step-by-step guide to address this:
- Turn Off the Main Power: Before inspecting any electronic device, always ensure your safety first. Locate your home’s main power switch or the relevant circuit breaker and turn it off.
- Check the Batteries: If your thermostat is battery-operated:
- Remove the faceplate carefully. Most models allow you to gently pull or slide it off.
- Examine the batteries. Look for any signs of corrosion or leakage. Corroded batteries can disrupt the power supply.
- Replace the batteries. Always use fresh, recommended battery types.
- Inspect Wiring for Hard-wired Models: If your thermostat is not battery-operated:
- Open the thermostat casing, typically done by either unscrewing or unclipping it.
- Look for any loose or disconnected wires. Each wire should be securely connected to its respective terminal.
- If you spot any visibly damaged or frayed wires, they might need replacement. It’s advisable to consult or hire a professional for wire replacements to ensure safety and accuracy.
- Reset Circuit Breaker: In case of a tripped circuit:
- Locate your home’s electrical panel.
- Find the switch that corresponds to the thermostat or the area it’s located in.
- If it’s in the “off” position or stuck in the middle, flip it to “on.”
- Restore Main Power: Once you’ve done the necessary checks and adjustments, turn the main power or circuit breaker back on.
- Test the Thermostat: After restoring power, the thermostat display should light up. Adjust the temperature settings slightly to see if the thermostat responds and the HVAC system kicks in.
If after these steps the display is still not working, the issue might be more complicated and may require a professional’s assessment or further troubleshooting of other potential causes.
Fix 2: Addressing Software Glitches
Sometimes, the reason behind a malfunctioning Honeywell thermostat display lies in its software. Here’s a comprehensive guide to resolving software-related issues:
- Manual Restart: Most devices benefit from a simple restart.
- Locate the reset button. Many models have a dedicated button, but some may require pressing a combination of buttons.
- Press and hold for a few seconds. The screen might go blank briefly.
- Wait for it to restart. If successful, the display should light up with the default settings.
- Factory Reset: If a basic reset doesn’t work, reverting to factory settings might help.
- Access the main menu on the thermostat.
- Navigate to the settings or system options.
- Select ‘Factory Reset’ or an equivalent option. This will erase all your customized settings, reverting the thermostat to its original factory settings.
- Software Update: Some thermostats, especially smart models, receive firmware or software updates.
- Check if your model supports this feature by consulting the user manual or visiting Honeywell’s official website.
- If available, follow the provided steps to update the software. An updated version might fix any glitches or bugs affecting the display.
- Check for Error Messages: Occasionally, the thermostat might display error messages instead of regular settings.
- Note down any codes or messages.
- Refer to the user manual or Honeywell’s official website for an explanation and recommended solutions for these specific errors.
- Inspect for Overheating: Electronic devices, when overheated, can act erratically.
- Feel the thermostat. If it’s unusually warm, it might be overheating.
- Ensure it’s not placed in direct sunlight or near heat-producing appliances.
- Contact Honeywell Support: If you’ve exhausted the above steps and the issue persists:
- Get in touch with Honeywell’s customer service or technical support.
- They might offer specific troubleshooting for your model or advise on potential replacements if the unit is faulty.
Remember, while it’s great to troubleshoot on your own, if you ever feel out of depth or unsure about a step, consulting a professional or the manufacturer’s helpline can be invaluable.
Read more: TV.marriott.com not working
Fix 3: Dealing with Dirt and Debris
Over time, the internals of a Honeywell thermostat can gather dust and debris, which might impede its functionality. Here’s a systematic guide to addressing this often-overlooked issue:
- Safety First: Before starting, turn off the thermostat’s power source to ensure there’s no risk of electric shock.
- Gently Remove the Faceplate: Most Honeywell thermostat models allow you to either gently pry off or slide out the faceplate.
- Visual Inspection: Once the faceplate is removed:
- Look for any visible dust or dirt accumulation.
- Pay particular attention to the screen area and any buttons or touch-sensitive areas.
- Soft Brush Cleaning:
- Use a soft-bristled brush, like a paintbrush or an old toothbrush, to delicately brush away dust from the interior components.
- Ensure your strokes are gentle to avoid dislodging any internal components or wires.
- Compressed Air:
- For tighter spots or harder-to-reach areas, consider using compressed air.
- Position the nozzle at a slight angle to blow away debris without pushing it further inside the unit.
- Clean the Display Screen:
- Use a microfiber cloth, slightly dampened with water or screen cleaner, to wipe the display screen.
- Ensure the cloth isn’t too wet, as excess moisture can harm the device.
- Reattach the Faceplate: Once you’ve thoroughly cleaned the internals:
- Carefully snap the faceplate back into position or slide it back in, ensuring it fits snugly.
- Power On and Test:
- Turn the power back on.
- Observe if the display appears clearer and responds better to touch or button inputs.
- Regular Maintenance:
- To avoid future issues, consider making this cleaning a bi-annual ritual. Regular maintenance can prolong the life of your thermostat and ensure smoother operation.
If, after cleaning, the display remains unresponsive or unclear, there might be other underlying issues that need attention. Always consider reaching out to Honeywell’s support or a local technician for further advice.
Fix 4: Tackling Screen Lock and Settings
Sometimes, the issue with a Honeywell thermostat display can be due to unintentional settings changes or the screen lock feature. Delving into these settings can often unearth and resolve the mystery behind an unresponsive display.
- Activate the Display:
- Many thermostats have a display setting that dims or turns off the screen after a period of inactivity. Simply pressing any button or touching the screen can reawaken it.
- Screen Lock Feature:
- Some models come equipped with a security feature that locks the screen to prevent unintended changes.
- Usually, this can be unlocked by pressing two specific buttons simultaneously or holding down one button for a few seconds.
- Consult your user manual for the exact button combination for your model.
- Brightness Settings:
- The display brightness might have been turned down inadvertently, making it appear off.
- Access the settings or menu and find the display or brightness option. Adjust it to your desired level.
- Temperature Display Settings:
- Some Honeywell thermostats have settings that only light up the display when the temperature changes or when it’s actively heating or cooling.
- Explore the settings menu and adjust the display preferences accordingly.
- Full System Reset:
- If you suspect an unintentional settings change and can’t locate it, consider performing a full system reset.
- Be mindful; this will revert all your customized settings to factory defaults.
- The reset process varies among models, so refer to the user manual for specific instructions.
- Consult the User Manual:
- Honeywell offers a range of thermostats, each with its own set of features and settings. When in doubt, the user manual is a treasure trove of information.
- Familiarize yourself with the various settings and controls, ensuring you have maximum command over your device.
- Technical Support:
- If you’ve gone through the above steps and still encounter problems, it might be time to reach out.
- Honeywell’s customer support can offer guidance tailored to your specific model, and they might be aware of common issues or provide firmware updates.
Navigating through settings and understanding them can sometimes be a challenge. However, patience and a systematic approach, combined with a handy user manual, can often illuminate the path to resolution.
Fix 5: Addressing Thermostat Age and Wear
Like all electronic devices, Honeywell thermostats have a lifespan. As they age, they can exhibit signs of wear and tear that might affect their performance. Addressing the age factor requires a slightly different approach:
- Visual Inspection:
- Look for obvious signs of wear on the device. Cracks, discoloration, or fading can be indicative of an older unit nearing the end of its service life.
- Erratic Behavior:
- Aging thermostats might not only have display issues but could also exhibit erratic temperature controls or frequent restarts. Note down any irregular behavior as it can give insights into potential problems.
Fix 6: Environmental Interference and Placement
Believe it or not, the environment around a Honeywell thermostat can greatly influence its performance. An overlooked yet crucial factor, the placement and surroundings of the thermostat, can lead to display malfunctions and other operational hiccups. Here’s a guide to troubleshoot such issues:
- Direct Sunlight Exposure:
- If your thermostat is placed where it gets hit by direct sunlight, it can overheat, causing the display and other functions to become erratic.
- Consider relocating the thermostat or using shades or blinds to block direct sunlight.
- Airflow and Drafts:
- Being positioned near vents, windows, or doors can expose the thermostat to irregular temperature fluctuations. This can not only affect temperature readings but also the device’s overall performance.
- Ensure your thermostat is placed in a location with stable ambient temperature.
- High Humidity Levels:
- Excessive moisture can harm the internal components and lead to display issues.
- If your thermostat is in a high humidity area, like near a bathroom or kitchen, consider using dehumidifiers or relocating the device.
- Electrical Interference:
- Placing the thermostat near devices that emit strong electromagnetic fields, like large appliances or specific electronics, can interfere with its operations.
- Try moving other electronic devices away from the thermostat or relocating the thermostat itself.
- Physical Barriers:
- Sometimes, large furniture pieces or decor can obstruct the thermostat, affecting its efficiency and potentially its display functionality.
- Ensure the area around the thermostat is clear, allowing it to function optimally.
- Inspect for External Damage:
- External factors like accidental spills, impacts, or even curious pets can affect the thermostat.
- Check for any signs of physical damage, moisture spots, or tampering.
- Optimal Placement:
- As a rule of thumb, thermostats should be placed at average height on an interior wall, away from direct sunlight, vents, windows, and large appliances. If your current location doesn’t match this, consider relocating the device.
- Consult an Expert:
- If you’re unsure about the optimal place for your thermostat or how the environment might be affecting it, consulting an HVAC expert can provide clarity. They can suggest the best placement considering the unique layout and conditions of your home.
By ensuring your Honeywell thermostat is in the right environment and optimally placed, you can safeguard its longevity, efficiency, and ensure a crystal-clear display for easy readings and adjustments.
Fix 7: Power Source and Wiring Issues
Power supply issues can often be the culprit behind a malfunctioning Honeywell thermostat display. Delicate wiring, a drained battery, or problems with the circuit can lead to intermittent or non-operational displays. Here’s how to troubleshoot these potential issues:
- Battery Check:
- Some Honeywell thermostats are powered by batteries. Over time, these batteries can deplete, causing the display to dim or turn off.
- Open the battery compartment, replace the old batteries with fresh ones, and ensure they are positioned correctly.
- Circuit Breaker:
- A tripped circuit breaker can cut off power to the thermostat.
- Check your home’s electrical panel to see if the breaker linked to the thermostat has tripped. If so, reset it and observe if the display returns.
- Wiring Inspection:
- With the power off, gently remove the thermostat faceplate.
- Examine the wires connected to the thermostat for any signs of damage, corrosion, or disconnection.
- Tighten Loose Connections:
- Using a screwdriver, ensure that each wire is securely connected to its corresponding terminal.
- Loose wires can lead to inconsistent power supply and display issues.
- Check the Wire Insulation:
- Ensure the insulation on the wires isn’t stripped excessively, which can cause shorts or poor connections.
- C-Wire Consideration:
- Some modern thermostats require a C-wire (common wire) to provide consistent power. If your system lacks this wire, the thermostat might experience power-related malfunctions.
- Consult a professional to see if your system requires a C-wire and if it can be added.
- Voltage Test:
- Using a multimeter, you can check if the correct voltage is reaching the thermostat. Ensure it aligns with the manufacturer’s specifications.
- Power Cycling:
- Turn off the power to your thermostat, wait a few minutes, then turn it back on. This simple reboot can sometimes resolve minor power and display glitches.
- Professional Help:
- Electrical issues can be complex. If you’re not comfortable troubleshooting them, or if the steps above don’t resolve the problem, it’s wise to consult an electrician or HVAC technician. They can diagnose and address any underlying wiring or power issues.
By ensuring a steady and appropriate power supply to your Honeywell thermostat, you can maintain a vibrant, responsive display and ensure the device functions at its optimal capacity.
Fix 8: Firmware and Software Updates
In our increasingly digital age, even thermostats like the Honeywell models rely heavily on software. Occasionally, glitches in the system or outdated firmware can lead to display-related issues. Addressing these software problems can bring your thermostat back to life:
- Check for Updates:
- Many modern thermostats have the ability to connect to Wi-Fi and download updates. Navigate to the settings or menu section and look for an option related to software or firmware updates.
- Stable Internet Connection:
- Ensure your thermostat maintains a strong and stable Wi-Fi connection during the update process. Interruptions can lead to incomplete updates, further complicating issues.
- Automatic Updates:
- Some Honeywell thermostats may be set to update automatically. If this feature is turned off, consider enabling it to ensure your device always runs the latest software version.
- Reset to Factory Settings:
- If the display issue began after a recent update, a software glitch could be the cause. Resetting the thermostat to its factory settings might resolve this. Note: this step will erase all your custom settings.
- Manual Update:
- If your thermostat doesn’t connect to Wi-Fi or has issues downloading updates, visit Honeywell’s official website. They may offer manual update files which you can download and install using a USB connection or other methods detailed by the manufacturer.
- Compatibility Issues:
- Ensure your thermostat model supports the latest updates. Installing software not designed for your model can lead to malfunctions.
- Notifications and Alerts:
- Some thermostats may notify you of successful updates or alert you to potential software errors. Pay attention to these messages, as they can provide insights into the device’s health.
- Consultation:
- If software-related problems persist or if you’re unsure about the update process, reaching out to Honeywell’s customer support can be beneficial. They can guide you through the process or offer solutions specific to your model.
- Stay Informed:
- Periodically check Honeywell’s website or subscribe to their newsletters. Staying updated about any known software issues or newly released updates ensures your thermostat runs efficiently.
Timely software and firmware updates not only enhance the performance of your Honeywell thermostat but also introduce new features, security patches, and fixes for known bugs. Regularly updating your device ensures a smooth, glitch-free experience.
Prevention Tips: Ensuring Longevity of Your Honeywell Thermostat Display
Maintaining the pristine function of your Honeywell thermostat goes beyond reactive measures. Proactive steps can keep display and functionality issues at bay. Here are some preventive tips to ensure the longevity of your thermostat’s display:
- Regular Cleaning: Dust and debris can accumulate on and inside the thermostat. Gently clean the exterior with a soft cloth and use compressed air to clear out any debris from the vents or gaps.
- Avoid Direct Sunlight: As mentioned earlier, direct sunlight can affect the thermostat’s functionality. Ensure it’s placed away from windows or areas that receive strong sunlight.
- Protect from Moisture: Avoid installing the thermostat near areas with high humidity like bathrooms or kitchens. If you must, consider using protective covers or barriers.
- Routine Check-ups: Periodically inspect the thermostat’s wiring, batteries, and settings to ensure everything is in order. Early detection can prevent minor issues from escalating.
- Update Regularly: Always keep the thermostat’s software up-to-date. Updated software can prevent potential glitches and improve overall functionality.
- Safe Handling: If you ever need to move or adjust the thermostat, handle it with care. Avoid applying excessive force or pressure, especially on the display.
- Educate Household Members: Ensure all family members know how to operate the thermostat correctly. Incorrect usage or accidental settings changes can lead to issues.
- Avoid Crowding: Ensure the space around the thermostat is free from large furniture, decor, or other electronic devices that might interfere with its operation.
- Use Surge Protectors: Electrical surges can damage electronic devices, including thermostats. Consider using surge protectors in your home to safeguard against unexpected electrical spikes.
- Stay Informed: Regularly consult the user manual and Honeywell’s official resources. They often provide valuable insights and tips to maintain the device’s optimal performance.
By following these preventive measures, you not only ensure a consistently clear and functional display but also enhance the overall lifespan and efficiency of your Honeywell thermostat. Proactive care is the key to a hassle-free experience.
Conclusion
While a non-responsive Honeywell thermostat display can be a cause for concern, it’s usually an issue that can be resolved with some simple troubleshooting. Whether it’s a power hitch, software glitch, or even an aging unit, the solutions provided should help guide you in restoring your device’s functionality. Always ensure you consult your user manual or contact a professional if in doubt. Your home’s comfort is essential, and ensuring your thermostat functions flawlessly is a step in the right direction.
FAQs
Power loss, drained batteries, or circuit issues might be the cause.
Absolutely! Outdated firmware can lead to display problems.
Typically every year, but consult the manual for specifics.
Yes, direct sunlight can cause overheating and erratic behavior.
Regular maintenance and updating software are two key steps.
Erratic readings or flickering displays hint at interference.
Absolutely! Location impacts temperature readings and overall efficiency.