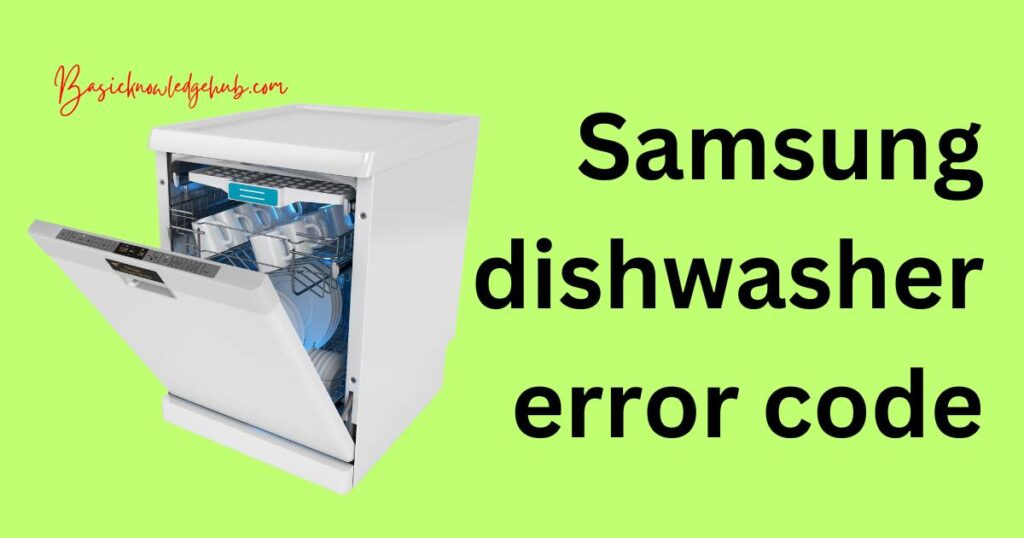
Samsung dishwasher error code
Samsung dishwashers are known for their efficiency and advanced features, but like any electronic appliance, they can sometimes encounter issues. One common problem users face is the dreaded “Samsung dishwasher error code.” These error codes appear as a combination of letters and numbers on the display panel, leaving you puzzled about what went wrong. Don’t worry; you’re not alone in this. In this detailed guide, we’ll unravel the mystery behind Samsung dishwasher error codes, explain the reasons behind them, and provide step-by-step instructions on how to fix them. Whether you’re a DIY enthusiast or just want to understand what’s happening with your dishwasher, this article will equip you with the knowledge you need.
Understanding Samsung Dishwasher Error Codes
Samsung dishwasher error codes are a part of the appliance’s self-diagnostic system. When an issue arises, the dishwasher displays a specific code on the control panel to help users identify the problem. These codes are crucial for troubleshooting and can save you time and money on unnecessary service calls.
Don’t miss: Bosch dishwasher error code e24
Reasons behind common Samsung dishwasher error codes
Certainly, here are the reasons behind common Samsung dishwasher error codes:
- LC – Leakage Error:
- Faulty Gaskets: Damaged or worn-out door gaskets can allow water to leak out during the wash cycle.
- Loose Hoses: Loose or improperly connected hoses within the dishwasher can result in water leakage.
- Blocked Drain: A clogged drain can cause water to overflow and trigger the LC error code.
- HE – Heater Error:
- Heating Element Damage: A malfunctioning or damaged heating element can’t heat the water properly.
- Wiring Issues: Loose or corroded wires connected to the heating element can disrupt its functionality.
- OE – Water Overflow Error:
- Float Switch Blockage: If the float switch is stuck or obstructed, it may not signal the dishwasher to stop filling with water, leading to overflow.
- Drain Hose Obstruction: A kinked or clogged drain hose can prevent water from draining, causing an overflow.
- SE – Sensor Error:
- Sensor Contamination: Dirty or contaminated sensors may provide inaccurate readings, triggering the SE error.
- Wiring Problems: Poorly connected or damaged sensor wires can disrupt communication with the dishwasher’s control panel.
- LE – Leakage Sensor Error:
- Leakage Sensor Damage: A malfunctioning leakage sensor fails to detect water leaks within the dishwasher.
- Corroded Connections: Corrosion on the sensor’s wiring connections can impair its performance.
- CE – Communication Error:
- Control Board Issues: Problems with the control board or its connections can lead to communication errors within the dishwasher’s electronic components.
- 9E – Low Water Level Error:
- Water Supply Problems: Insufficient water supply due to a closed valve or low water pressure can trigger the 9E error.
- Inlet Valve Obstruction: A clogged water inlet valve may restrict water flow into the dishwasher, resulting in a low water level error.
Don’t miss: Samsung TV Plus not working? Here’s your fix guide
How to Fix Samsung dishwasher error codes?
Fix 1: Addressing LC – Leakage Error
The LC error code on your Samsung dishwasher indicates a leakage issue that needs prompt attention. To resolve this problem and prevent potential water damage to your kitchen, follow these detailed steps:
- Step 1: Safety Precautions: Before starting any troubleshooting, ensure the dishwasher is disconnected from the power supply. Safety is paramount when dealing with electrical appliances.
- Step 2: Visual Inspection: Carefully open the dishwasher door and inspect the interior for any visible leaks. Look around the edges, especially near the door gasket, for water droplets or puddles.
- Step 3: Check for Loose Hoses: Check all the hoses connected to the dishwasher for loose or improperly secured connections. Ensure they are tightly fitted and properly sealed.
- Step 4: Clear Clogs: A clogged drain filter can lead to water overflow. Remove the filter and clean it thoroughly. Ensure there are no food particles or debris obstructing the drainage system.
- Step 5: Reboot the Dishwasher: After addressing any visible issues, plug the dishwasher back in or turn the power supply on. Start a new cycle to test whether the LC error code reappears.
By following these steps, you can often resolve the LC error code and prevent further leakage. However, if the problem persists or you’re unsure about any aspect of the repair, it’s advisable to contact a professional technician. They can conduct a more thorough inspection and address any underlying issues that may not be visible during a basic assessment.
Fix 2: Resolving HE – Heater Error
When your Samsung dishwasher displays the HE error code, it signifies an issue with the heating element, which is essential for heating the water during the wash cycle. Follow these detailed steps to address the HE error:
- Step 1: Prioritize Safety: Always begin by ensuring the dishwasher is disconnected from the power supply. Safety is paramount when working with electrical appliances.
- Step 2: Locate the Heating Element: Find the heating element, which is typically located at the bottom of the dishwasher’s tub. It resembles a coiled wire or a metal rod.
- Step 3: Visual Inspection: Inspect the heating element for any visible signs of damage such as burns, breaks, or corrosion. If you notice any issues, it may be the root cause of the HE error.
- Step 4: Test for Continuity: If you have access to a multimeter, you can test the continuity of the heating element. A lack of continuity indicates a faulty element that needs replacement.
- Step 5: Examine Wiring Connections: Carefully examine the wiring connected to the heating element. Loose or corroded wires can disrupt the heating process. Ensure all connections are secure and undamaged.
- Step 6: Reboot and Test: After addressing any issues with the heating element or wiring, reconnect the power supply. Run a test cycle to see if the HE error code is resolved.
Following these steps should help you diagnose and potentially fix the HE error. However, if the error persists or you’re uncertain about any part of the repair process, it’s advisable to seek the assistance of a qualified technician. They can provide a more comprehensive evaluation and perform any necessary repairs or replacements to ensure your dishwasher operates optimally.
Fix 3: Tackling OE – Water Overflow Error
When your Samsung dishwasher displays the OE error code, it indicates a problem with water overflowing in the appliance. This issue can lead to a messy kitchen if not addressed promptly. Here’s how to resolve the OE error:
- Step 1: Prioritize Safety: Begin by ensuring the dishwasher is disconnected from the power supply. Safety is crucial when dealing with electrical appliances.
- Step 2: Locate the Float Switch: The float switch is a small, usually round or rectangular device located at the bottom of the dishwasher’s tub. It’s responsible for monitoring the water level.
- Step 3: Visual Inspection: Inspect the float switch for any obstructions or debris that may be preventing it from moving freely. Clear any blockages you find.
- Step 4: Inspect the Drain Hose: Ensure the drain hose is not kinked, clogged, or damaged. A restricted drain hose can lead to water backing up and causing an overflow.
- Step 5: Check the Drain Pump: The drain pump might be clogged or malfunctioning. Remove any debris you find and ensure the pump functions correctly.
- Step 6: Reboot and Test: After addressing any issues with the float switch, drain hose, or pump, reconnect the power supply. Run a test cycle to confirm whether the OE error code is resolved.
By following these steps, you can often diagnose and fix the OE error, preventing water overflow and potential kitchen disasters. If the error code persists or if you’re unsure about any aspect of the repair, it’s advisable to consult a professional technician. They can conduct a more thorough inspection and address any underlying issues that may not be evident during a basic assessment.
Fix 4: Resolving SE – Sensor Error
When your Samsung dishwasher displays the SE error code, it signifies a problem with one of the dishwasher’s sensors, which are crucial for monitoring water levels and temperature. Here’s how to troubleshoot and address the SE error:
- Step 1: Prioritize Safety: Always start by ensuring the dishwasher is disconnected from the power supply. Safety is paramount when working with electrical appliances.
- Step 2: Locate the Sensor: Find the sensor, which is usually located near the bottom of the dishwasher’s interior. It may resemble a small, round or rectangular device.
- Step 3: Visual Inspection: Gently clean the sensor with a soft, damp cloth to remove any dirt, grime, or residue that might be affecting its performance.
- Step 4: Examine Wiring Connections: Carefully examine the wiring connected to the sensor. Loose or damaged wires can disrupt communication between the sensor and the dishwasher’s control panel.
- Step 5: Reboot and Test: After cleaning the sensor and ensuring proper wiring connections, reconnect the power supply. Run a test cycle to verify if the SE error code has been resolved.
Following these steps should help you diagnose and potentially fix the SE error. However, if the error persists or if you’re uncertain about any part of the repair process, it’s advisable to seek the assistance of a qualified technician. They can provide a more comprehensive evaluation and perform any necessary repairs or replacements to ensure your dishwasher operates smoothly.
Fix 5: Addressing LE – Leakage Sensor Error
The LE error code on your Samsung dishwasher indicates an issue with the leakage sensor, responsible for detecting water leaks within the appliance. To troubleshoot and resolve the LE error, follow these steps:
- Step 1: Prioritize Safety: Begin by ensuring the dishwasher is safely disconnected from the power source. Safety is paramount when dealing with electrical appliances.
- Step 2: Locate the Leakage Sensor: Find the leakage sensor, typically situated near the bottom of the dishwasher’s interior. It’s a small, sensor-like component responsible for detecting leaks.
- Step 3: Visual Inspection: Inspect the leakage sensor for visible damage, corrosion, or blockages. A malfunctioning sensor can trigger the LE error.
- Step 4: Examine Wiring Connections: Carefully examine the wiring connected to the leakage sensor. Loose or corroded wires can disrupt the sensor’s communication with the dishwasher’s control panel.
- Step 5: Reboot and Test: After addressing any issues with the leakage sensor or its wiring, reconnect the power supply. Run a test cycle to determine if the LE error code has been successfully resolved.
By following these steps, you can often diagnose and rectify the LE error, preventing further complications related to water leaks. However, if the error persists or if you’re unsure about any aspect of the repair, it’s advisable to seek the assistance of a professional technician. They can conduct a more thorough inspection and address any underlying issues that may not be readily visible during a basic assessment.
Fix 6: Resolving CE – Communication Error
When your Samsung dishwasher displays the CE error code, it indicates a communication problem within the dishwasher’s electronic components. Here’s how to troubleshoot and address the CE error:
- Step 1: Prioritize Safety: Always begin by ensuring the dishwasher is disconnected from the power supply. Safety is paramount when dealing with electrical appliances.
- Step 2: Access the Control Board: Open the dishwasher’s control panel to access the control board, which is the central hub for the appliance’s electronic functions.
- Step 3: Visual Inspection: Inspect all the connections on the control board for any loose or disconnected wires. Ensure that they are securely and properly seated.
- Step 4: Perform a Control Board Reset: To reset the control board, disconnect and then reconnect the wires and connectors. This simple step can often resolve communication errors.
- Step 5: Reboot and Test: After addressing any issues with the control board connections and performing the reset, reconnect the power supply. Run a test cycle to verify if the CE error code has been resolved.
Following these steps should help you diagnose and potentially fix the CE error, restoring proper communication within the dishwasher’s electronic components. However, if the error persists or if you’re uncertain about any part of the repair process, it’s advisable to seek the assistance of a qualified technician. They can provide a more comprehensive evaluation and perform any necessary repairs or replacements to ensure your dishwasher operates seamlessly.
Fix 7: Solving 9E – Low Water Level Error
When your Samsung dishwasher displays the 9E error code, it means that the dishwasher isn’t filling with enough water, which can impact its cleaning performance. Here’s how to troubleshoot and address the 9E error:
- Step 1: Safety First: Always begin by ensuring the dishwasher is disconnected from the power supply. Safety is paramount when dealing with electrical appliances.
- Step 2: Check Water Supply: Verify that the water supply to the dishwasher is turned on. Ensure the water inlet valve, typically located beneath the dishwasher, isn’t closed or obstructed.
- Step 3: Examine the Inlet Valve: The water inlet valve may be clogged or malfunctioning, preventing sufficient water from entering the dishwasher. Examine it for any blockages and ensure it opens and closes correctly.
- Step 4: Check the Float Switch: The float switch, usually located at the bottom of the dishwasher, could be stuck in the “up” position, indicating a full dishwasher. Check for obstructions and ensure it moves freely.
- Step 5: Reboot and Test: After addressing issues with the water supply, inlet valve, and float switch, reconnect the power supply. Run a test cycle to confirm whether the 9E error code is resolved.
By following these steps, you can often diagnose and fix the 9E error, ensuring your dishwasher receives an adequate water supply for efficient cleaning. If the error persists or if you’re unsure about any aspect of the repair process, it’s advisable to seek the assistance of a professional technician. They can conduct a more thorough inspection and perform any necessary repairs or replacements to ensure your dishwasher operates effectively.
Fix 8: Addressing PF – Power Failure Error
In some cases, your Samsung dishwasher may display the PF error code, indicating a power failure or interruption during operation. Here’s how to troubleshoot and address the PF error:
- Step 1: Safety First: Begin by ensuring the dishwasher is disconnected from the power supply. Safety is crucial when dealing with electrical appliances.
- Step 2: Check the Power Supply: Confirm that the electrical outlet the dishwasher is connected to is functioning correctly. Check if there are any other appliances sharing the same circuit that could be causing power fluctuations.
- Step 3: Reset the Dishwasher: To clear the PF error, press and hold the Start/Reset button for several seconds. This action should reset the dishwasher’s control board.
- Step 4: Reboot and Test: After resetting the dishwasher and ensuring a stable power supply, reconnect the power source. Run a test cycle to confirm if the PF error code has been resolved.
By following these steps, you can often address the PF error, which is usually related to power interruptions. However, if the error persists or if you suspect an underlying electrical issue, it’s advisable to consult a qualified technician to ensure the dishwasher operates reliably and safely.
Preventive Tips to Avoid Samsung Dishwasher Error Codes
Maintaining your Samsung dishwasher properly can help prevent error codes and ensure it operates smoothly. Here are some preventive tips to keep in mind:
- 1. Regular Cleaning and Maintenance
- Clean Filters: Clean the dishwasher’s filters regularly to prevent clogs and ensure efficient drainage.
- Wipe Gaskets: Keep the door gaskets clean and free from debris to maintain a proper seal.
- Check Spray Arms: Inspect the spray arms for blockages, and clean them as needed to maintain effective water distribution.
- 2. Use Quality Detergent and Rinse Aid
- Use Recommended Detergent: Follow the manufacturer’s recommendations for dishwasher detergent to prevent residue buildup and poor cleaning performance.
- Rinse Aid: Use rinse aid to improve drying performance and prevent spots on dishes.
- 3. Proper Loading: Load Dishes Correctly: Avoid overloading the dishwasher, as this can obstruct spray arms and prevent thorough cleaning. Follow the user manual’s loading instructions.
- 4. Maintain Proper Water Supply:
- Check Water Pressure: Ensure your home’s water pressure is within the recommended range for your dishwasher model to prevent fill-related errors.
- Inspect Water Inlet Valve: Regularly examine the water inlet valve for signs of wear or damage and replace it if necessary.
- 5. Address Leaks Promptly: If you notice any water leaks around the dishwasher, address them promptly to prevent water damage and potential error codes like LC.
- 6. Perform Regular Inspections:
- Inspect Wiring: Periodically check the dishwasher’s wiring connections to ensure they are secure and free from corrosion.
- Test Sensors: Run diagnostic tests (as per the user manual) to check the sensors’ functionality and ensure they are accurately detecting conditions within the dishwasher.
- 7. Avoid Hard Water Buildup: If you have hard water in your area, consider installing a water softener to prevent mineral buildup on dishwasher components.
- 8. Use Dishwasher Cleaner: Periodically use a dishwasher cleaner recommended by the manufacturer to remove scale, residue, and odors.
- 9. Regularly Update Software: If your dishwasher has smart features, make sure to keep the software up-to-date to prevent communication errors.
- 10. Professional Maintenance – Schedule Professional Servicing: Consider scheduling annual maintenance checks with a professional technician to catch potential issues before they lead to error codes.
By following these preventive tips, you can minimize the chances of encountering error codes on your Samsung dishwasher and enjoy hassle-free dishwashing performance.
Conclusion
Samsung dishwasher error codes may seem daunting at first, but with the right knowledge and steps, you can tackle them effectively. Remember to always prioritize safety by disconnecting the power before troubleshooting. Whether it’s a leakage error (LC), heater error (HE), water overflow error (OE), sensor error (SE), leakage sensor error (LE), communication error (CE), or low water level error (9E), understanding the root cause and following the recommended fixes can save you time and money. Keep your dishwasher in top-notch condition by regularly maintaining it and promptly addressing error codes. If you ever feel unsure or uncomfortable with any repair, don’t hesitate to seek professional assistance. By doing so, you’ll ensure your Samsung dishwasher continues to deliver sparkling clean dishes for years to come. Happy dishwashing!
FAQs
Error codes indicate specific issues in the dishwasher’s operation, helping with troubleshooting.
A malfunctioning or damaged heating element can cause this error. It needs inspection and, if necessary, replacement.
OE occurs due to float switch blockage or drain hose obstructions. Inspect and clear them to resolve it.
LE can happen due to a faulty leakage sensor or corroded connections. Inspect, clean, or replace as needed.