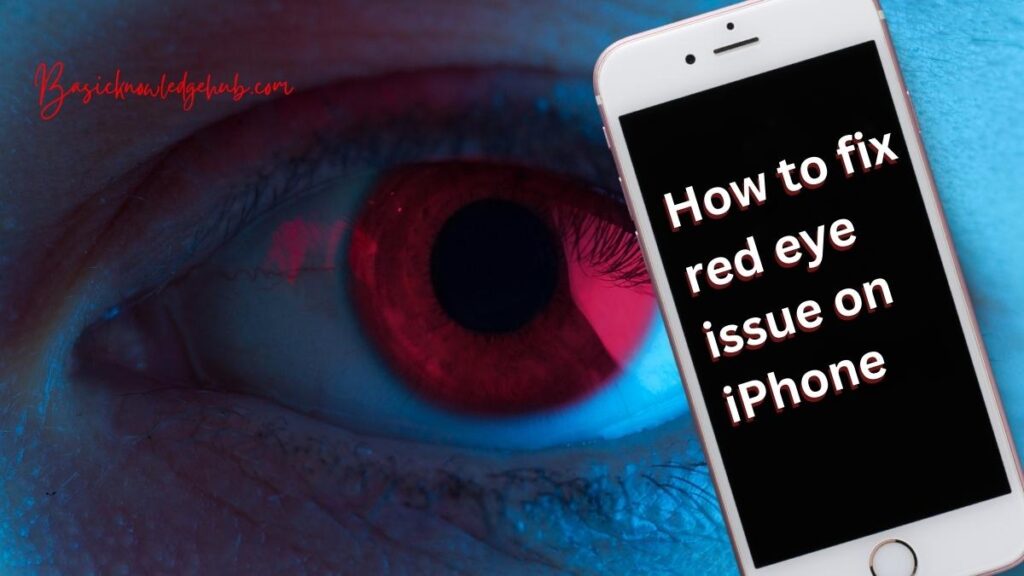
How to fix red eye issue on iPhone
We’ve all seen this nascent incident when taking photos or group photos where our eyes turned like a devil’s eyes? The problem is known as the red-eye problem. It’s hilarious and annoying in the same breath, isn’t it? What can you do to fix the red eye problem on iPhone?
This undesirable thing is an effect of photography. It’s because it’s your retina that has reflected the light of the camera, which caused it to change color. The red-eye problem is something everybody wants to solve absolutely. Therefore, let’s gain an overview of what causes an issue with red eyes, how it happens and the possible solutions.
What is the mechanism by which the red-eye phenomenon occur?
Let’s look at a scenario where the surrounding area is dark. In such a scenario the retina will expand, allowing more light to fill. In such a situation, someone could snap a picture of us using an flash. This flash causes only reflection. When light strikes the eye, it causes the pupils to expand. This causes light to activate the cells at the rear of the eye that synthesizes it and transforms the light rays into electronic signals. These pulses produce visual images inside our brains. A small part of the light gets absorption. The remainder is reflected back toward the lens on the camera. Why is the color red? It’s due to the eye’s choroid, which is awash with blood vessels. If you click on the image of an animal it might appear yellow or green.
So, it’s obvious that the red-eye effect could draw attention away from the real beauty of the photograph. The image may be unworthy for sharing via social networks.
Is there technologically-savvy solutions to fix the red-eye issues on iPhone?
Yes, it is. With advances technological advancements and new features it’s now possible. Even if you’re already an iPhone user! The latest versions of iOS, such as iOS14 or iOS15 can fix this problem. It’s not necessary that you must always utilize a third-party application to solve this issue. Third-party apps may cost some cash for their services. Editing multiple images with this approach could not look very appealing. However, it’s your decision. Some of the apps on the market are extremely great.
Let’s take a look at some of the best and most effective and technologically-savvy methods to get rid of red-eyes on iPhones.
Repair red-eye problem using “Photos” within the iPhone by itself:
- Launch “Photo’ application. From the pictures, choose the image that displays the red-eye problem.
- Look in the upper right corner. You will see an “Edit” option. Tap it.
- Examine the icon using the icon with a “slashed eye“. Click it. If you don’t see this you might think your device isn’t equipped with the ability to correct red eyes.
- Then, you will be directed to choose the eyes with redness you would like to correct. Therefore, you must apply pressure to each red eye in a precise manner.
- Repair it, and then Click on “Done” at the bottom of the right-hand corner.
The red-eye issue has been resolved!
Utilizing third-party applications:–
No matter what version of iPhone you’re employing, there are numerous user-friendly apps that can eliminate eye-strain from your photographs. Let’s take a look at some of the most reliable software to fix red eyes on the iPhone device.
Red Eye Corrector
Very effective apps for removal of eyes in photographs.
- Start the application.
- Select the image.
- The app is able to process automatically your red eyes.
- The red eye can be fixed quickly.
- Save the edited image on your camera roll or upload it immediately to social media.
Photoshop Express:-
It’s one of the top photo editing software that is all-in-one. The app also comes with the feature of taking out red eyes from pictures. The application uses sophisticated filtering technology to eliminate imperfections from photos, such as eyes that are red. The eye option is able to eliminate photos that have red eyes with little hassle.
The application allows you to save edited files in PDF format. However, the navigation features could be confusing and the extra light may be required to allow the AI to identify that red-eye.
Quick Removal:
This application is available on iPhone is widely regarded as an effective red eye corrector tool. AI technology plays a role in spotting red eyes and eliminating their redness, giving the eyes an edgier, more natural appearance.
- The most interesting thing is that its application is so easy. It is as simple as that.
- Launch the application. Select the picture taken from your camera roll. Let the app take care of the rest.
- It is evident that the issue is resolved. You can then save the photo directly onto the camera roll.
But, the application is limited to a certain extent. To unlock its full potential you must subscribe to its annual package.
Facetune2:-
A fantastic program for photo editing. Enhances your photo with a new appearance. It features a particular button to locate and eliminate eyes that are red. If the area is significantly larger it could not work. If that happens you could try to alter the color several times. That’s a good method to handle it. Fine-tune your editing using your red-eye slider.
There are pros and cons with the application are:
The app is flexible when editing. But , it requires to be subscribed to save the edited images. This is a major disadvantage certain.
Pixl application:
Apart from fixing red eyes, it also allows further editing by using multiple filters. Red-eye removal software can be fascinating, so be aware. Just,
- Click to reveal the ” Wand” icon.
- Pick ” Red eyes“.
- Look at the eyes with red spots and correct the eyes.
You can switch between various shades available in black. One of the interesting aspects of this application is that it maintains the image’s quality. The results do not appear like it’s not natural or unnatural. However, the application is lengthy.
BeautyPlus:-
A few technical aspects can be involved in fixing the red-eye issue with this application. There isn’t a specific button to fix this. It is necessary to go to” makeup” and then go to the “makeup” section. After that, you can add your automatic AI lenses to eliminate the red-eye issue. Yes, it’s difficult and also quite difficult. This application is reliable, however, it is not the ideal choice to solve the red-eye problem. It’s quite lengthy and also the free version has numerous advertisements.
Cymera:-
A multi-functional app is also available on the market, with various editing tools. It’s all completely free. The red eye fixing feature is a separate interface. To get it to work, just do this –
- Navigate and change to “Edit” mode.
- Search for the editing menu.
- Click on the ” Beauty” option.
- Make sure you tap the eyes of red on your photo and then repair it.
- The result is the most basic kind of originality.
The app is free of ads and easy to use. However, be cautious when editing as touching other red spots could result in black dots on the final image.
Corrector of red eye and Remover AI
One of the easiest editors available on one of the most basic editors on iPhone. The app is completely automated and is a step ahead of other apps to correct the glowing eyes that appear in photographs. It allows users to process multiple images at the same time.
Simply fix the issue and then export the resultant image to your picture gallery. This option is very useful and is a good option for those who want to fix the red eye problems on your iPhone.
It’s true that using third-party applications can be a great method to eliminate red-eye issues. But what if we take a few small steps when taking photos? This could reduce the chance of experiencing red-eye symptoms to nearly none! Yes, it’s real and feasible if we abide by some basic guidelines such as:
- Switching on the light: As stated in the beginning, the red eye problem primarily is caused by the surrounding light being dark. Our pupils increase in size and to reflect flash of the camera. It is best to turn on a light prior to shooting to allow the retina exposure to light, rather than an abrupt constriction after your camera starts flashing.
- Do not stare straight at your camera: The rate of reflection is highest when the person is looking directly at the camera. So, it is possible to request that the person look slightly to toward the side or the back of the camera to alter the direction of reflection. So, the red-eye problem is prevented from the beginning.
- Utilizing red-eye reduction settings: Certain sets of devices come using a reduction in red eyes option. This is an extremely unique and intriguing feature. The typical camera flashes when taking a picture. In this particular scenario it flashes twice! The first flash allows for the pupil of the subject to overcome the constriction, giving another flash more chance of being free of errors.
- Do not click on the image with the flash turned on: We’re aware by now that eyes with red spots are optical phenomenon that is associated with light. In the eyes, retina reflect the flash, and it follows. This is why it is recommended not to make use of flash. If the surrounding area has optimal lighting, then try taking the picture without using flash. If you’re not sure then press to the light symbol (lightning bolt) until it states flash off. You can configure this by adjusting the icon in accordance with your requirements of your. Insufficient flashes increase the risk of red eyes forming.
- With a separate flash and lens: Many cameras feature a lens that is close towards the flash. In such situations the issue of red eyes is the most prevalent. One technique to stop this is to utilize the external light source. This permits the photographer to shift the lens away from the camera and adjust the angle of reflection.
- Avoid using flash while drinking: It’s a new scientific finding! The reason is that when the person in the photo is drinking, their pupils don’t appear to be in a normal condition. They are more reactive than other pupils. The light produced by flash has a longer reflective time. That’s why the eyes of people with flashes are more likely to appear red in photographs.
- The use of the bounce flash: Instead of direct focus on the photo object, the light is directed at a medium. The medium could be anything between the floor or an umbrella. However, it must be light-colored. Special photographic reflectors have been designed to serve this for this purpose. In this case, refracted light is employed instead of reflecting light. This eliminates red-eye incidents.
- A deeper comprehension of iSO: It is the response of the camera to flash is referred to as ISO. When you notice that the ISO values are low this indicates that the camera is less active. A greater ISO value suggests a higher sensitive. This could refer towards any movie or digital sensor. A thorough understanding of ISO is vital. It will tell us whether flash is required in the first place or not. Take a look at a hypothetical scenario in which the subject is in dim lighting. In contrast the camera you’re carrying is equipped with an ISO value of between 1600 and 3200. It’s surprising that in this case you might not require the flash in any way.
- Be cautious when clicking on children: To admit it, the motive for this is amusing. Children usually have larger pupils than the average adult. Therefore, there’s a lot of blood vessels behind the retina. Therefore, they are more likely to have a high chance of having eyes that are red in photographs. We can all be able to deny having took these photos to scare our children or our cousins. Didn’t we?
Conclusion
So, to end, we must admit that more modern iPhone cameras have become so advanced that they’re not exposed to red-eye issues, even though the surrounding lighting is dim. Yes, the ‘ Photos‘ app has proved helpful in helping people eliminate the red-eye problem, but making use of third-party applications is not an unwise choice. In fact, it offers us additional editing options, too. If you often have to correct red-eyes caused by flash in photographs, third-party software might be worth considering. We hope this article can help you gain a clear plan for the next time they have to deal with red-eye issues on their iPhone.
FAQs
To be truthful, this issue is also solved with a simple solution. There’s a solution called the red-eye remover. It is readily accessible in any photography studio or shop. Make sure you have two copies of the image in case you’re not pleased with the final result. The red-eye remover can be found by using green colored ink with a clear state. The ink, when applied to the eyes of a red can easily fix it.
Insufficient illumination is the most important reason behind eyes that are red, even on iPhones. It is better to have the proper lighting prior to taking photos. This will eliminate the chance of having red eyes at the beginning. Then, you can address the issue with applications too.
You can change the eyes’ redness to normal, but only if you’d like to. Don’t be expecting your device to correct it by itself. It is possible to keep it in tact too. However, it is likely to draw the attention of the viewer and the appeal of the photograph is removed.