My Mac is running slow
Fed up being embarrassed in front of peers for getting stuck in the middle of a presentation? Frustrated with losing video games because of lagging? Or annoyed by files taking an eternity to get loaded? Are You Thinking Why “My Mac is running slow“, Trust me we know exactly how it feels when your laptop or computer starts to run slow. Just as you, many others also face the same troubles with their laptop and computers.
To solve this problem for the users who have to face this we have come up with this article. In this article, we have discussed all the possible reasons responsible for your Mac to slow down. Not only the problems but you will also find the solutions to them in this very article. Read this till the end and next time whenever your Mac is running slow you will be able to fix it all by yourself.
Not one or two but there can be multiple reasons that can reduce the speed of your Mac. So let us start discussing them one by one along with their fixes.

Heavy resource software may cause Mac is running slow
We know that every computing device is installed with some software programs that perform different computational tasks. These software programs use the resources of your computer to carry out their operations. The more complex the operation, the more resources it ends up using.
Now there may be instances when you may not be even using an application or software but still, it keeps running in the back of your system. And when some heavy resource-consuming application runs in the backend of your system it naturally becomes sluggish. This can be the reason for any computer device to become slow, your Mac too.
This problem can be fixed very easily. And you can get your Mac to work just as fast as it did before. Just make sure that no software is unnecessarily using up your Mac’s resources in the back. You can very easily check this on a Mac through one of its utility features called the Activity Monitor. It is a very handy feature that allows users to track real-time resource consumption on their Mac.
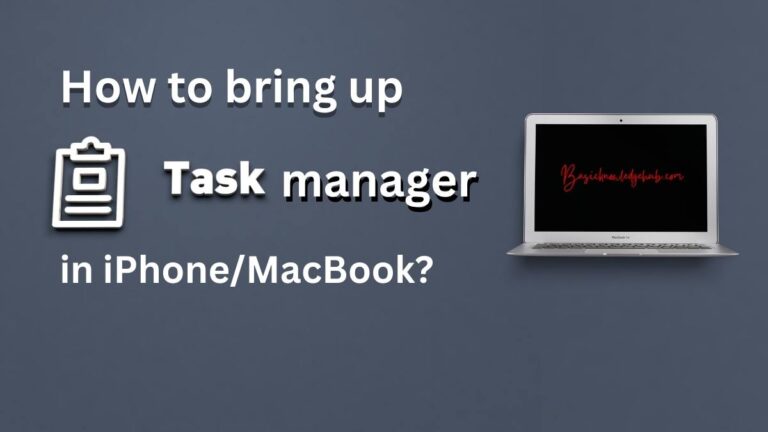
This feature is quite similar to the Task Manager in Windows. While checking the Activity Monitor you may find some unnecessary software using a huge amount of your computer’s resources. You can manage and exit these heavy resource software and applications from the Activity Monitor itself. I am sure that after you do so the speed of your Mac will increase noticeably.
Access the Activity Monitor
To access the Activity Monitor on your own Mac you can follow these steps:
- Click on the Go menu present on the menu bar of the Finder app.
- A list of options will appear. Select Utilities from the list of options.
- Now double click on the Activity Monitor among all other utilities present there. And that is it you will be able to access the Task Manager equivalent app on your Mac.
- There are other methods too that can be followed to open the application. Like using the Finder feature in Mac.
- Directly open the Finder from the dock of your Mac.
- On the sidebar of the Finder window look for Applications and click on it.
- Then go to the folder named Utilities where you will find the Activity Monitor app. Now just double-click on it to open.
- You can also use spotlight on Mac (Command + Space) to search and open Activity Monitor.
- Once you open the Activity Monitor you will notice that there are five different tabs in the application. They are the CPU tab, Memory tab, Energy tab, Disk tab, and the Network tab. All these tabs display the various parameters of your Mac’s resources.
- CPU Tab: The CPU tab particularly shows you how various software and applications are accessing your Mac’s processor.
- Memory Tab: This tab helps to monitor the RAM usage of your Mac. Through this tab, you can easily find if any application is using more RAM than normal.
- Energy Tab: It provides you with a list of apps and processes that consume the most amount of power. This can come in very handy if you are dealing with poor battery life on your Mac.
- Disk Tab: This tracks the amount of data read in and written out from your storage by processes during their operation. It gives you an overview of how well your storage unit is working.
- Network Tab: As the name suggests, it keeps a record of how much data is uploaded and downloaded over your network.
- After checking the parameters if you find any app or process to be misbehaving, using up more resources, or running in the back unnecessarily then close it directly.
- For closing them directly from the Activity Monitor:
- Double click on the app or process. This will open a new window displaying more details of the app’s system usage.
- In the same window, you will get an option to quit the app. Click it and the particular app or process will exit. And therefore it will stop using your system resources.
- Just closing the application at fault will only solve the problem for the time being. There are high chances that this problem will come up again with the app. To avoid this, consider finding a better alternative to the application.
Inadequate storage space
Sometimes the hard drive of our computer fills up almost to its capacity. And when this happens our system starts to misbehave and lag. This is why we must keep a regular check on our disk space usage. The process to do so is very simple.
- Click on the Apple icon at the top left corner of your Mac’s screen.
- Select the About This Mac option from the list.
- A window with all the details of your Mac system will open up. There will be five tabs in the top portion of this window namely Overview, Displays, Storage, Support, and Service.
- Out of the five tabs select the Storage tab to view a simple breakdown of your Mac’s storage usage.
On the same screen, you will find a Manage button that helps to manage the storage in your Mac. It shows a detailed analysis of your hard drive’s storage usage along with a set of four recommendations. These recommendations are to assist you in freeing up space. Storage in iCloud, Optimize Storage, Empty Trash Automatically, and Reduce Clutter are the four categories that the recommendations are classified into.
Storage in iCloud
iCloud is Apple’s cloud storage service. So this feature lets you move your document, image, video, and other files to iCloud from your hard drive. This is a very convenient feature as apart from clearing your disk it also makes your files available to access from any other device where you are signed in with your Apple ID.
Optimize Storage
Clicking this button will delete all movies and TV shows downloaded on your Mac that you have completed watching. Nothing to worry though, you will be able to download your purchases again from iTunes.
Empty Trash Automatically
Even the files that you have already deleted take up your drive space. This is because the files you delete are not deleted completely, your computer just moves them to the Trash. If gone unnoticed this can quickly fill your disk. Therefore, it is important to clear your trash frequently and the Empty Trash Automatically option exactly does the same. It automatically deletes the Trash items on your computer that exceed 30 days.
Reduce Clutter
What this tool does is sort all the big files that have been occupying a large amount of space. You can then browse through those files and delete the ones that you no longer need.
These are some tricks that you can try if you feel your Mac is running slow due to inadequate disk space.
An outdated operating system may be the reason Mac is running slow
macOS is the operating system software used in Mac, just like iOS in iPhones. Apple keeps on improving its operating system by releasing new software updates from time to time. Apart from bringing in new additional features, software updates also improve security and fix existing bugs.
Operating on an old macOS can cause compatibility problems and affect Mac’s user experience. It may also be the reason why your Mac is running slow. That is why you must always upgrade to the latest operating system software.
Here we have tried to walk you through the process to check and install new software updates on Mac.
- Click on the Apple symbol there on the menu bar.
- Select About This Mac next.
- A window with all your Mac details will pop up. This includes your current macOS software details.
- Here only you will find a button named Software Update, click on it.
- If your Mac is updated with the latest macOS software then well and good. Otherwise, you will read a message ‘An update is available for your Mac’ with an Update Now button beside. Press the button and follow the instructions to update.
Bulk cache memory
A cache is nothing but a memory component of your computer that stores certain files and data. It stores data temporarily based on the tasks that you have performed earlier on your computer. This helps the machine to fetch you results quicker.
Apart from the advantages, it can cause problems if allowed to stack up for a long time. A slow power-up is among the most common problems that users have to face because of bulk cache storage.
Check out the steps on how to clear cache memory on Mac.
- On the menu bar of the Finder app click on the Go menu.
- From the options, select Go to Folder and type “~/Library/Caches”.
- Then press the return key and select the files that are old or that you do not need anymore.
- Right-click to open the options and select Move to Trash.
- You can then also go on to completely delete those cache files from your machine by emptying your Trash.
Login items
Along with bulk cache memory, login apps may also account for the slow startup of Macs. Some apps are automatically launched by the system when you switch on your Mac. The idea behind this is to get you going as soon as you open the device without wasting time. But sometimes it could go exactly the opposite way.
Let me show you how to manage login items on Mac so that next time you do not experience a slow powerup.
- Click the Apple icon on the menu bar.
- Go to System Preferences and select the Users & Groups option.
- On the next page, click on the lock icon at the bottom-left corner.
- Provide your username and password to unlock and continue.
- Then select your username and click on Login Options.
- Apps under the Login Items tab are the ones that launch automatically when the device starts.
- Check the boxes for the login apps that you want to close.
- Lastly, click the lock icon to save your changes.
Read Also: how to split screen on mac
Malware & virus

This could be of course one of the reasons why your Mac is running slow and the most serious one too. You can get your Mac infected with malware and spyware from any place nowadays. It may come from an unsecured website, unknown email attachments, or a malicious application.
Therefore it is wise to check your device for malware and viruses once in a while. Here are the steps.
- Open the Finder app and click on Go from the menu bar.
- Select Utilities and then look for Disk Utility.
- After you click open Disk Utility you will find a First Aid option.
- Click on First Aid and Run it.
- Post-run, a green check will mean your computer is free from any kind of malware. Try this test with all the items present on the left column of the Disk Utility window. And if the result comes out to be negative then you must install an antivirus for your Mac.
Conclusion
If you have come this far reading I am sure that next time whenever you feel that your Mac is running slow or not performing to its full potential, you will be able to fix it all by yourself.
I hope you find this article helpful. Keep connected with BasicKnowledgeHub as we keep bringing to you more interesting and insightful technical topics. Goodbye as of now.