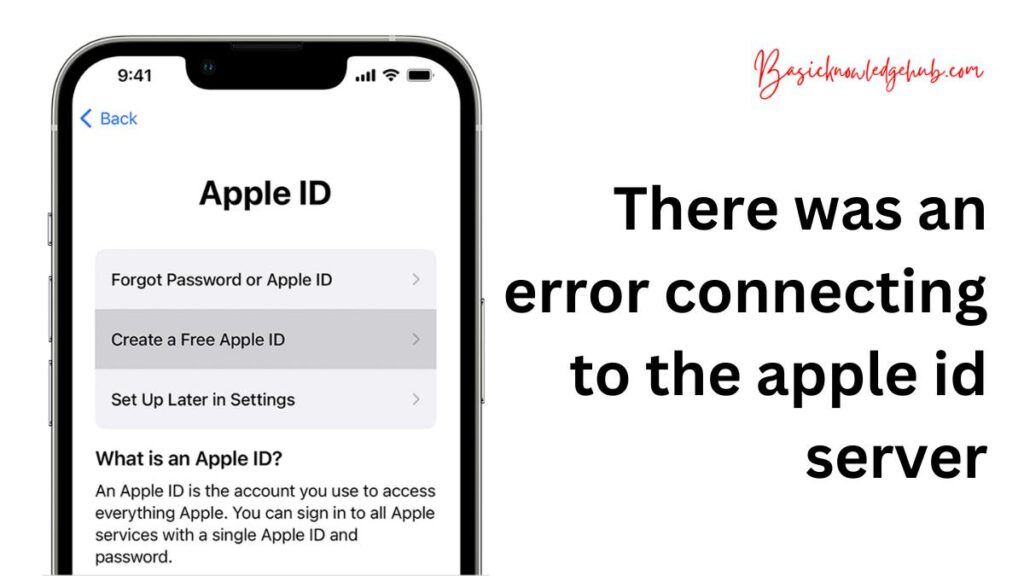
There was an error connecting to the apple id server
Apple users often praise the seamless integration of devices and services. Yet, sometimes, unexpected errors can disrupt this smooth experience. One common hiccup is the dreaded message: “There was an error connecting to the Apple ID server”. But what causes this issue? More importantly, how can you resolve it? We dive deep into the possible reasons and solutions below.
Why does there was an error connecting to the apple id server occur?
- Unstable Internet Connection: A stable internet connection is vital. If your network is weak or dropping intermittently, you’ll likely face this problem.
- Outdated Software: Not keeping your device’s OS up-to-date can result in compatibility issues.
- Server Outages: Sometimes, Apple’s servers face outages, making it impossible to connect.
- Incorrect System Date and Time: Surprisingly, an incorrect system date or time can block your device from connecting to Apple’s servers.

How to fix there was an error connecting to the apple id server?
Fix 1: Check and Stabilize Your Internet Connection
When you encounter the message, “There was an error connecting to the Apple ID server”, one of the primary culprits could be an unstable or weak internet connection. Since your device requires a robust connection to communicate with Apple’s servers, it’s essential to ensure that your internet is functioning optimally. Here’s how to troubleshoot and stabilize it:
Step 1: Toggle Between Wi-Fi and Cellular Data
- If you’re connected to Wi-Fi, try switching to cellular data or vice versa. This action can determine if the issue lies with a specific connection type.
Step 2: Restart Your Modem or Router
- Unplug your modem or router from the power source.
- Wait for about 30 seconds to 1 minute.
- Plug it back in and allow it to completely start up. This can often refresh your internet connection and resolve minor glitches.
Step 3: Forget and Reconnect to Your Wi-Fi Network
- On your device, go to Settings > Wi-Fi.
- Find your current network and tap on the information (i) icon.
- Tap Forget This Network and confirm.
- After forgetting the network, reconnect by selecting your network from the list, entering the password, and tapping Join.
Step 4: Test Your Internet Speed
- Use speed testing platforms like Speedtest.net to check your internet speed. If it’s significantly slower than your subscribed speed, consider contacting your service provider.
Step 5: Stay Closer to Your Wi-Fi Router
- If you’re on a Wi-Fi connection, ensure that you’re not too far from the router. Walls and distance can dampen the signal strength.
Don’t miss: Roblox error code 1001
Fix 2: Update Your Device to the Latest iOS Version
A common yet overlooked solution to many device-related issues, including the “There was an error connecting to the Apple ID server” error, is ensuring your device’s software is up-to-date. Outdated software might have bugs or compatibility issues that could interfere with server connections.
Step 1: Check for Available Updates
- Open Settings on your Apple device.
- Navigate to General > Software Update.
- Your device will check for updates. If an update is available, it will be displayed here.
Step 2: Backup Your Device
Before installing any major update, it’s wise to backup your data.
- Connect your device to Wi-Fi.
- Go to Settings > [your name] > iCloud.
- Scroll down and tap iCloud Backup.
- Tap Back Up Now and wait for the backup to complete.
Step 3: Download and Install the Update
- If an update is available from the Software Update menu, tap Download and Install.
- Depending on your device’s settings, you might need to enter your passcode to proceed.
Step 4: Ensure Ample Battery or Connect to Charger
- Updates can be battery-intensive. Ensure your device has enough battery, preferably above 50%. Alternatively, plug it into a charger to avoid interruptions.
Step 5: Follow On-Screen Instructions
- Once the download completes, your device will prompt you to install the update. Follow the on-screen instructions to complete the process.
Step 6: Check Apple ID Connection
- After the update and device restart, try connecting to the Apple ID server again.
Fix 3: Correct System Date and Time
One of the more surprising yet effective fixes for the “There was an error connecting to the Apple ID server” error is ensuring your device’s system date and time are accurate. A mismatch can cause authentication and connection problems.
Step 1: Automatic Setting
- Go to Settings on your device.
- Tap on General and then choose Date & Time.
- Ensure the Set Automatically option is toggled on. This allows your device to update its date and time based on your location and time zone.
Step 2: Manual Adjustment
If you suspect the automatic setting isn’t accurate or you’re in a location with no network:
- Toggle off Set Automatically in the Date & Time settings.
- Tap on the current date and time displayed.
- Adjust it manually to the correct date and time for your region.
Step 3: Time Zone Check
- Still under the Date & Time settings, verify that the time zone listed is appropriate for your current location.
Step 4: Restart Your Device
- Once you’ve ensured the date and time are correct, give your device a quick restart. This can help apply any changes effectively and refresh the system.
Step 5: Re-attempt Connection
- After restarting, try connecting to the Apple ID server again.
Fix 4: Sign Out and Sign In to Your Apple ID
At times, refreshing your Apple ID credentials can work wonders in resolving the “There was an error connecting to the Apple ID server” message. By simply signing out and then logging back into your Apple ID, you can re-establish a clean connection with Apple’s servers.
Step 1: Navigate to Apple ID Settings
- Open Settings on your device.
- At the top, you’ll see your name indicating your Apple ID profile. Tap on it.
Step 2: Sign Out of Your Apple ID
- Scroll to the bottom and find the Sign Out option. Tap on it.
- You may be prompted to enter your Apple ID password for verification.
Step 3: Restart Your Device
- After signing out, power off your device.
- Wait for a few moments, then turn it back on. This ensures a fresh start post-sign-out.
Step 4: Sign In Again
- Go back to Settings.
- At the top, instead of your profile, you should now see an option to Sign in to your iPhone (or iPad). Tap on it.
- Enter your Apple ID credentials and follow any on-screen instructions to complete the sign-in process.
Step 5: Test the Connection
- Once you’re signed in, try accessing a service or feature that requires Apple ID authentication, such as the App Store or iCloud. This will help you verify if the error is resolved.
Fix 5: Reset Network Settings
Network-related issues are a common cause for the “There was an error connecting to the Apple ID server” error. By resetting network settings, you can clear any potential glitches or conflicts within your device’s network configurations.
Step 1: Backup Your Device
Before making any significant changes, always backup:
- Connect to Wi-Fi.
- Go to Settings > [your name] > iCloud.
- Tap on iCloud Backup, then Back Up Now.
Step 2: Navigate to Reset Options
- From the main Settings page, tap on General.
- Scroll to the bottom and tap on Reset.
Step 3: Choose Reset Network Settings
- In the reset options list, tap on Reset Network Settings.
- You might be prompted to enter your device’s passcode to confirm the action.
Step 4: Confirm the Reset
- A dialog box will pop up, asking for confirmation. Proceed by tapping on Reset Network Settings again.
Step 5: Allow Your Device to Restart
- Once you confirm, your device will automatically restart. This is a standard process as it clears all saved network settings.
Step 6: Reconnect to Your Network
- After the restart, manually reconnect to your preferred Wi-Fi network. You’ll need to re-enter the Wi-Fi password since previous settings have been wiped.
Step 7: Check Apple ID Connection
- Try accessing a service linked to your Apple ID, such as the App Store. This will let you verify if the reset resolved the server connection error.
Fix 6: Check Apple’s System Status
Sometimes, the issue might not be on your end at all. Apple’s servers, like any other tech infrastructure, can experience downtimes. If Apple’s servers are down, you might face difficulties accessing various Apple services.
Step 1: Visit Apple’s System Status Page
- On any browser, search for “Apple System Status” or go directly to Apple’s official System Status page.
Step 2: Review the Service Status
- The page displays the operational status of various Apple services. Look for Apple ID or related services in the list.
- If there’s an outage or any issue, it’ll be indicated with a yellow or red dot next to the service name.
Step 3: Check Related Services
- It’s not just the Apple ID service that can affect connectivity. Other connected services, like the App Store or iCloud, can influence the Apple ID functioning. Ensure that they are also running without issues.
Step 4: Stay Updated
- If there is an ongoing issue with any of Apple’s services, the company usually provides timely updates regarding the status of the problem and expected resolution time. Keep an eye on this page if there are reported outages.
Step 5: Wait it Out
- If Apple’s servers are experiencing issues, there’s not much you can do from your end. Be patient and wait for Apple to resolve the server problem. They usually act quickly to address any outages.
It’s essential to remember that even massive tech giants like Apple aren’t immune to technical hiccups. Before diving deep into troubleshooting steps on your device, always check if the issue is widespread. This can save you time and unnecessary stress, ensuring you remain informed and updated.
Fix 7: Clear Safari Cache and Cookies
Though it might seem unrelated, Safari’s cache and cookies can sometimes interfere with Apple ID authentication processes. Clearing them might just be the solution you need for the “There was an error connecting to the Apple ID server” issue.
Step 1: Navigate to Safari Settings
- Open Settings on your device.
- Scroll down and tap on Safari.
Step 2: Clear Cookies and Data
- Inside Safari’s settings, you’ll find an option labeled Clear History and Website Data. Tap on it.
- A confirmation pop-up will appear, prompting you to confirm the action. Continue by selecting Clear.
Step 3: Restart Your Device
- Once you’ve cleared Safari’s cache and cookies, power off your device.
- After waiting for a few moments, turn your device back on. This ensures a fresh start after clearing the data.
Step 4: Check Your Apple ID Connection
- After the restart, try accessing services or functions associated with your Apple ID to check if the error persists.
Step 5: Consider Using Another Browser (Optional)
- If you continue to face issues and suspect it might be browser-related, consider downloading and using another browser, like Chrome or Firefox, for Apple-related web services.
Fix 8: Disable VPN and Proxy Services
Using VPNs or proxies can sometimes interfere with the connection between your device and Apple’s servers. Disabling them temporarily might help in resolving the “There was an error connecting to the Apple ID server” problem.
Step 1: Disable VPN
- If you have a VPN app installed, open it.
- Locate the Disconnect or Turn Off option within the app and select it.
- Return to your device’s home screen to ensure the VPN indicator isn’t displayed in the status bar.
Step 2: Check VPN in Settings
- Go to Settings.
- Look for a VPN section or setting. Ensure it’s toggled off.
Step 3: Disable Proxy
- In Settings, go to Wi-Fi.
- Tap on the connected Wi-Fi network’s name.
- Scroll to the bottom and tap on Configure Proxy.
- Ensure it’s set to Off or None. If not, change the setting, and then tap Save.
Step 4: Restart Your Device
- After disabling the VPN and proxy, power off your device.
- Wait for a minute, then turn it back on.
Step 5: Attempt Reconnecting to Apple ID Server
- Once your device restarts, try accessing any Apple ID-dependent service to verify if the issue persists.
Preventing the “There Was an Error Connecting to the Apple ID Server” Issue
Prevention is always better than a cure. While you now have a comprehensive toolkit of fixes for the “There was an error connecting to the Apple ID server” problem, it’s equally crucial to know how to prevent it from happening in the first place. Here are some valuable tips to ensure a seamless Apple experience:
1: Keep Your Device Updated
- Regularly update your device’s operating system to the latest version. Updates often include bug fixes and improvements that enhance server connectivity.
2: Maintain a Stable Internet Connection
- Prioritize a reliable internet connection, especially when dealing with sensitive services like Apple ID authentication. Strong Wi-Fi or cellular signals are essential.
3: Don’t Overlook the Date and Time
- Check and ensure that your device’s date, time, and time zone settings are accurate. A mismatch can lead to authentication errors.
4: Monitor Server Status
- Before diving into troubleshooting, check if Apple’s servers are experiencing outages or issues. This can save you time and unnecessary efforts.
5: Use Trusted Networks
- Avoid using public Wi-Fi networks that might be less secure. Use networks you trust, preferably with a password.
6: Limit Third-Party Software
- While third-party apps are useful, some can interfere with Apple’s services. Be cautious and disable any apps causing connectivity problems.
7: Clear Cache and Cookies Regularly
- Maintain a habit of clearing your browser’s cache and cookies periodically to ensure smooth online interactions, including Apple ID authentication.
8: Avoid Frequent Network Changes
- Constantly switching between Wi-Fi and cellular data can confuse your device’s network settings. Stick to one network whenever possible.
9: Secure Your Apple ID
- Keep your Apple ID credentials secure and use strong passwords. Regularly update your password and enable two-factor authentication for an extra layer of security.
10: Contact Apple Support
- If you encounter persistent issues despite following prevention tips, don’t hesitate to reach out to Apple Support. They’re equipped to provide tailored solutions.
Conclusion
Facing the “There was an error connecting to the Apple ID server” message can be frustrating. However, with the above solutions at your fingertips, you’re well-equipped to tackle the issue head-on. Whether it’s a minor glitch or a broader server outage, these steps will guide you to a seamless Apple experience once again. Remember, technology isn’t infallible, but with a bit of patience and troubleshooting, most hurdles can be overcome. Safe browsing!
FAQs
This error arises due to connectivity issues between your device and Apple’s servers.
Begin by checking your internet connection and making sure it’s stable and strong.
Update your device’s software; outdated software can lead to compatibility problems.
Absolutely, Apple’s servers can face outages. Check Apple’s System Status page to verify.
Resetting network settings erases saved Wi-Fi passwords and clears network configurations.


