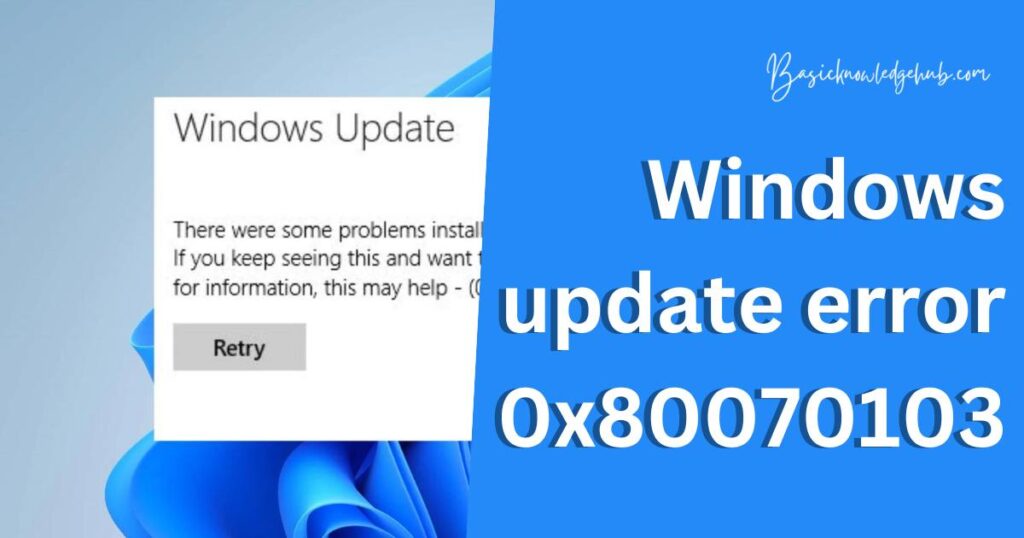
Windows update error 0x80070103
Have you ever been greeted with the cryptic Windows update error 0x80070103? Fear not. In this in-depth guide, we will untangle the mystery behind this error and provide an effective solution. So, buckle up as we delve into the world of Windows troubleshooting.
What is Windows Update Error 0x80070103?
Windows update error 0x80070103 can pop up when updating your Windows system. It’s not uncommon and has been a nuisance for many users. Typically, it’s related to the device drivers on your computer. This error message signals that your system is attempting to reinstall an already installed driver or a driver incompatible with your device.
Causes Behind Windows Update Error 0x80070103
Understanding the reason behind the issue is key to effective troubleshooting. Let’s look at the primary reasons causing Windows update error 0x80070103.
Attempt to Reinstall an Already Installed Driver
The foremost reason for this error is when your Windows attempts to reinstall a driver that is already present on your system. This act of redundancy triggers the Windows update error 0x80070103. The system fails to distinguish between the new and the existing driver, causing a conflict and thus, the error message pops up.
Installation of Incompatible Device Driver
Another potent reason behind this error is the attempt of the system to install a driver that is incompatible with your device. If the Windows system perceives the driver to be important but it turns out to be unsuitable for your device, the update process can fail. This mismatch in compatibility triggers the error 0x80070103.
Understanding these two root causes can empower you to prevent the occurrence of the Windows update error 0x80070103 and also troubleshoot it effectively when it happens.
How to Fix Windows Update Error 0x80070103?
Now that we know the possible causes, let’s explore how to fix Windows update error 0x80070103. Don’t worry, these steps are easy to follow and don’t require any advanced technical skills.
Fix 1: Manual Driver Update
The Windows update error 0x80070103 can be quite troublesome, but the solution is within your reach. Let’s start with the first fix that involves manually updating your device drivers.
- Step 1: Access the Device Manager: First things first, navigate to your computer’s ‘Device Manager’. You can do this by typing ‘Device Manager’ into the search box in the start menu or access it through the ‘Control Panel’.
- Step 2: Identify the Problematic Driver: Within the ‘Device Manager’, you will see a list of all the devices connected to your computer. Identify the driver that you suspect might be causing the issue. Typically, it might show a yellow exclamation mark if there’s a problem.
- Step 3: Update the Driver: Once you’ve identified the problematic driver, it’s time to update it. Right-click on the driver’s name, and from the dropdown menu, choose ‘Update driver’.
- Step 4: Search for Updates: A new window will appear with two options. Choose ‘Search automatically for updated driver software’. Your system will then search online for the latest driver update.
- Step 5: Install the Update: If there’s an update available, your system will download and install it automatically. Once the update is complete, you’ll need to restart your system for changes to take effect.
By following these steps, you can manually update your drivers, potentially resolving the Windows update error 0x80070103.
Read more: How To Secure Your Windows Login with MFA?
Fix 2: Hiding the Troublesome Update
If manual driver updates didn’t fix the Windows update error 0x80070103, we have another effective method you can try. This involves hiding the problematic update.
- Step 1: Download the Troubleshooter: First, you’ll need to download the ‘Show or Hide Updates’ troubleshooter package. This tool is available on Microsoft’s official website.
- Step 2: Run the Troubleshooter: Once downloaded, run the ‘Show or Hide Updates’ troubleshooter. This will bring up a new window.
- Step 3: Hide Updates: In the troubleshooter window, select the ‘Hide updates’ option. This will trigger the tool to search for updates on your system.
- Step 4: Select the Problematic Update: The troubleshooter will then present a list of updates available on your system. Identify the update that’s causing the Windows update error 0x80070103, then select it.
- Step 5: Hide the Selected Update: After selecting the problematic update, choose ‘Next’ to proceed. The troubleshooter will now hide this update, preventing Windows from trying to install it again.
After following these steps, restart your system. If done correctly, this should resolve the Windows update error 0x80070103.
Fix 3: Using Windows Update Troubleshooter
If the previous methods didn’t work, there’s another way to tackle the Windows update error 0x80070103. We can use the Windows Update Troubleshooter, a built-in tool in the Windows operating system designed to identify and fix update-related issues.
- Step 1: Access the Troubleshooter: You can find the Windows Update Troubleshooter in the ‘Settings’ menu of your system. To get there, go to ‘Settings’, then ‘Update & Security’, and finally, ‘Troubleshoot’.
- Step 2: Run the Windows Update Troubleshooter: In the ‘Troubleshoot’ window, you’ll find the ‘Windows Update’ option. Click on it, and then select ‘Run the troubleshooter’.
- Step 3: Let the Troubleshooter Work: The troubleshooter will start scanning your system for issues with Windows Update. If it finds any problems, including the Windows update error 0x80070103, it will try to fix them automatically.
- Step 4: Follow On-screen Instructions: During the process, the troubleshooter might prompt you to perform some actions. Follow the on-screen instructions until the troubleshooter completes the process.
- Step 5: Restart the System: Once the process is complete, restart your system. The Windows update error 0x80070103 should now be resolved.
Through the Windows Update Troubleshooter, we’re harnessing the power of Windows’s built-in tools to fix update issues and ensure a smooth and efficient functioning of your system.
Fix 4: Installing Updates Manually
If all else fails, don’t worry. We have one more fix to resolve the Windows update error 0x80070103. This time, we will attempt to manually install the updates that your system was trying to install automatically.
- Step 1: Note Down the Problematic Update: First, you need to identify and note down the KB number of the update causing the error. You can find this in the Windows Update history.
- Step 2: Visit Microsoft Update Catalog: Next, go to the Microsoft Update Catalog website. Here, you can find all the updates available for Windows systems.
- Step 3: Search for the Update: In the search box, enter the KB number of the problematic update. Press ‘Enter’ to search for this specific update.
- Step 4: Download the Update: From the search results, find the update that matches your system’s architecture (32-bit or 64-bit). Click on the ‘Download’ button next to it.
- Step 5: Install the Update Manually: Once the update is downloaded, double-click on the file to start the installation process. Follow the on-screen instructions to install the update manually.
After these steps, you should have successfully installed the update, bypassing the automatic update system that was causing the Windows update error 0x80070103. This manual process ensures that your system gets the necessary updates without running into recurring errors.
Fix 5: Uninstalling and Reinstalling the Device Driver
As our final method, we’ll look at uninstalling and reinstalling the device driver. Sometimes, the existing driver may have issues that a simple update can’t fix. Here’s how to uninstall and reinstall the problematic driver.
- Step 1: Open Device Manager: Firstly, open ‘Device Manager’ from the ‘Control Panel’ or by typing ‘Device Manager’ into the search box of your start menu.
- Step 2: Locate the Problematic Driver: Next, identify the problematic driver. This could be the driver that’s continually trying to update and causing the Windows update error 0x80070103.
- Step 3: Uninstall the Driver: Right-click on the problematic driver, and from the drop-down menu, select ‘Uninstall device’. Follow the prompts to uninstall the driver.
- Step 4: Restart Your System: After you’ve successfully uninstalled the driver, restart your computer. Windows will automatically attempt to reinstall the driver upon restart.
- Step 5: Install the Driver: If Windows doesn’t automatically reinstall the driver, you can do it manually. Go back to ‘Device Manager’, click on ‘Action’ from the menu, and then select ‘Scan for hardware changes’. Windows will detect the missing driver and reinstall it.
By uninstalling and reinstalling the problematic driver, you’re giving your system a fresh start. This could potentially solve the Windows update error 0x80070103, ensuring smoother updates in the future.
Fix 6: Performing a Clean Boot
Our last resort to fix the Windows update error 0x80070103 is by performing a clean boot. This process will start your system with a minimal set of drivers and startup programs, helping you eliminate software conflicts that occur when you install a program or an update.
- Step 1: Log in as an Administrator: First, ensure you’re logged into your computer as an administrator. The clean boot process requires administrator privileges.
- Step 2: Open System Configuration: Press the ‘Windows + R’ keys simultaneously to open the ‘Run’ dialogue box. Type ‘msconfig’ in the box and press ‘Enter’. This will open the ‘System Configuration’ window.
- Step 3: Configure Selective Startup Options: In the ‘System Configuration’ window, click on the ‘Services’ tab. Check the ‘Hide all Microsoft services’ box, then click ‘Disable all’. Next, click on the ‘Startup’ tab and then ‘Open Task Manager’.
- Step 4: Disable Startup Items: In the ‘Task Manager’, under the ‘Startup’ tab, you’ll see a list of startup items. Right-click on each item and select ‘Disable’.
- Step 5: Restart the System: Close the ‘Task Manager’. Go back to the ‘System Configuration’ window, click ‘OK’, and then restart your system.
After these steps, your system will start in a “clean boot” environment. This process helps mitigate any conflicts that might be causing the Windows update error 0x80070103. You can then attempt to perform the Windows Update again.
Fix 7: Resetting Windows Update Components
When none of the above solutions work, you can try resetting the Windows Update components. This method can help you fix the Windows update error 0x80070103 by resetting the whole update system.
- Step 1: Open Command Prompt: First, you need to open the ‘Command Prompt’. Do this by typing ‘Command Prompt’ into the search bar, then right-click on it and select ‘Run as administrator’.
- Step 2: Stop Windows Update Services: In the ‘Command Prompt’ window, type the following commands and press ‘Enter’ after each command:
- net stop wuauserv
- net stop cryptSvc
- net stop bits
- net stop msiserver
These commands will stop the Windows Update services, Cryptographic services, BITS service, and MSI Installer.
- Step 3: Rename SoftwareDistribution and Catroot2 folders: Next, type these commands to rename the ‘SoftwareDistribution’ and ‘Catroot2’ folders:
ren C:\Windows\SoftwareDistribution SoftwareDistribution.oldren C:\Windows\System32\catroot2 catroot2.oldThe system will create new folders when the services are restarted.
- Step 4: Restart Windows Update Services: Now, type the following commands to restart the services you stopped earlier:
- net start wuauserv
- net start cryptSvc
- net start bits
- net start msiserver
After these commands, close the ‘Command Prompt’.
- Step 5: Restart Your System: Finally, restart your system to apply all the changes you made. The Windows update error 0x80070103 should now be resolved.
Resetting Windows Update components can often be a last-ditch solution when dealing with stubborn update errors. But, remember, this method involves system-level operations. So, perform these steps cautiously.
Fix 8: Performing a System Restore
Our final solution to resolve the Windows update error 0x80070103 is to perform a System Restore. This process can revert your system to a previous state where it was functioning properly.
- Step 1: Access System Restore: Type ‘Create a restore point’ in the Windows search bar and select the top result to open the ‘System Properties’ window.
- Step 2: Initiate System Restore: Under the ‘System Protection’ tab in the ‘System Properties’ window, click on ‘System Restore…’.
- Step 3: Select a Restore Point: In the ‘System Restore’ window, select a restore point where your system was working fine. Click ‘Next’ to proceed.
- Step 4: Confirm Your Restore Point: Review your chosen restore point and confirm that it’s the correct one. Click on ‘Finish’ to initiate the System Restore process.
- Step 5: Wait for the Process to Complete: System Restore might take some time. Wait patiently for the process to complete. Once done, the system will restart.
After these steps, check if the Windows update error 0x80070103 is resolved. Please note that System Restore should be used as a last resort, as it can remove any system changes, updates, or installations made after the chosen restore point. Always ensure you have backed up important data before proceeding with a System Restore.
Tips to Prevent Windows Update Error 0x80070103
Here are some preventative measures you can take to avoid encountering the Windows update error 0x80070103 in the future:
Keep Your System Up-to-Date
One of the best ways to prevent errors is to regularly update your system. This includes not only the operating system but also all device drivers and installed applications.
Use Trusted Software
Using trusted software from reliable sources helps protect your system from conflicts and issues. Avoid downloading or installing unverified software from unknown sources.
Regularly Backup Your System
Backing up your system regularly ensures you have a safe point to return to if an update causes issues. Use Windows’ built-in System Restore feature to create restore points.
Perform Regular System Scans
Regularly scan your system using a reliable antivirus or system maintenance tool. These scans can detect and resolve potential issues before they cause significant problems.
Monitor the Health of Your Drivers
Always monitor the health of your device drivers. Corrupted or outdated drivers often cause update issues. Using a driver update tool can help you keep track of your drivers’ health and updates.
By following these tips, you can maintain the health of your system, prevent the occurrence of the Windows update error 0x80070103, and ensure a smooth and error-free Windows Update experience.
Conclusion
Windows update error 0x80070103 can be a stubborn issue. But remember, there’s always a solution at hand. From updating drivers manually to performing a system restore, we’ve explored a range of fixes. Each method targets specific causes, offering a tailor-made resolution.
If one fix doesn’t work, don’t worry. Simply move on to the next. By remaining patient and methodical, you’re sure to overcome this error. Our preventative tips also equip you to avoid future update issues. Therefore, maintaining regular system checks, updates, and backups is crucial.
Remember, a healthy system doesn’t happen by accident. It’s the result of consistent care and prompt, effective troubleshooting. So, the next time you encounter the Windows update error 0x80070103, you’ll know exactly what to do. Enjoy a smoother, more reliable computing experience. Keep learning, keep resolving, and stay updated!
FAQs
The error indicates a conflict when installing or updating device drivers on your Windows system.
The error can occur due to redundant driver installations or incompatibility between the driver and your device.
You can try updating drivers manually, hiding the problematic update, or using the Windows Update Troubleshooter.
In such cases, you can try hiding the update causing the error or performing a clean boot.
Yes, you can uninstall and reinstall the driver or perform a system restore to a previous working state.