How to Fix the Wrong Time on Windows 11
In this article, we’ll tackle a problem that Windows 11 users may face – dealing with an incorrect system time. If your computer displays the wrong time, it can lead to missed appointments and data confusion, causing all sorts of headaches. The good news is that fixing the wrong time on Windows 11 doesn’t require complex tech skills. We’ll walk you through the simple steps. By the end of this article, you’ll know how to fix time on Windows 11.
Why it’s Important to Have Accurate System Time?
Having an accurate system time is more important than you might think. It affects your computer in various ways and can make your life easier or vice versa. Here are some examples that explain why these settings matter:
- Precise time helps you stay organized, making sure you don’t miss vital meetings, appointments, or deadlines.
- Accurate time is essential for file management. Many files on your computer carry timestamps that show when they were created or modified. When your system time is off, these timestamps won’t line up with reality, causing confusion.
- Time plays a role in the performance of scheduled tasks. Some software rely on your computer’s time to carry out actions at specific moments. If your system time is incorrect, these scheduled tasks might not execute as intended.
- Third-party apps also can be affected by inaccurate system time. For example, some productivity apps, such as project management software or employee monitoring tools, often rely on precise time tracking. If your system time is off, it can lead to incorrect task data, making it difficult to monitor progress.
- The security of your computer relies on accurate time. It’s crucial for encryption and maintaining the synchronization of various security protocols. When your system time is off, it can disrupt these security measures and potentially expose your system to vulnerabilities.
Set Time Automatically
You may set your Windows to update the time automatically. It’s a smart move for keeping the clock accurate without manual adjustments. Here’s how to do it:
- Open Windows Settings. For quick access, use the Windows key + I shortcut.
- Go to Time & language > Date & Time
Alternatively, look at the system tray in the bottom-right corner of your screen. You’ll see the date and time. Click on it and choose Adjust date and time from the menu.
- In the Date & Time settings, you’ll see a toggle switch for Set time automatically. Slide it to the right to turn it on.
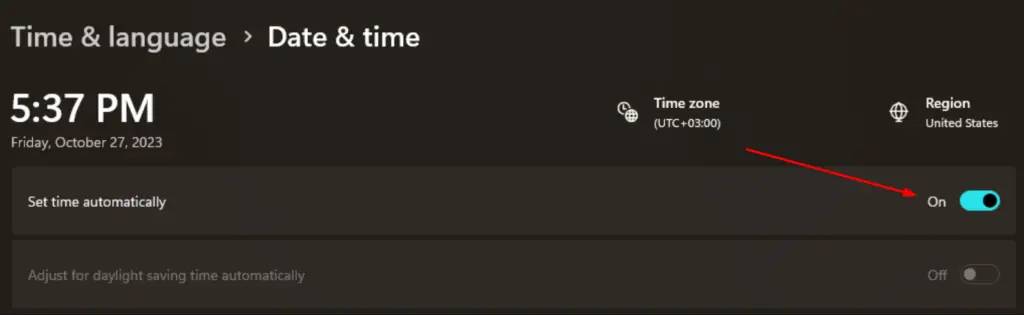
- While you’re here, ensure that Set time zone automatically is also turned on. This helps your computer choose the right time zone based on your location.
- Scroll down to “Additional settings” section and click on Sync now.
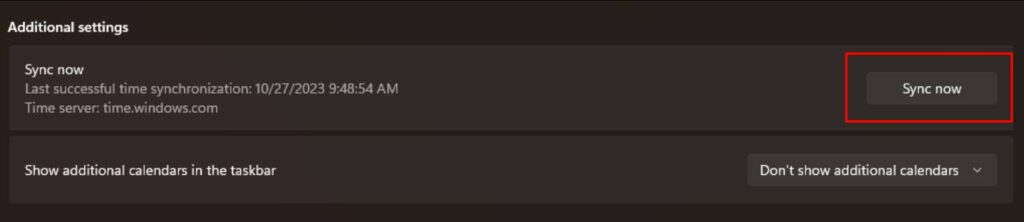
Your computer will now regularly connect to an internet time server to update the time automatically.
Change the Time Server
In the previous step, we discussed how to make your Windows 11 update the time from the internet automatically. But sometimes, the default server doesn’t work right, or you might want to use a different one. Here’s how you can choose another internet time server:
- Open the Date & Time settings.
- Scroll down until you spot Additional clocks.
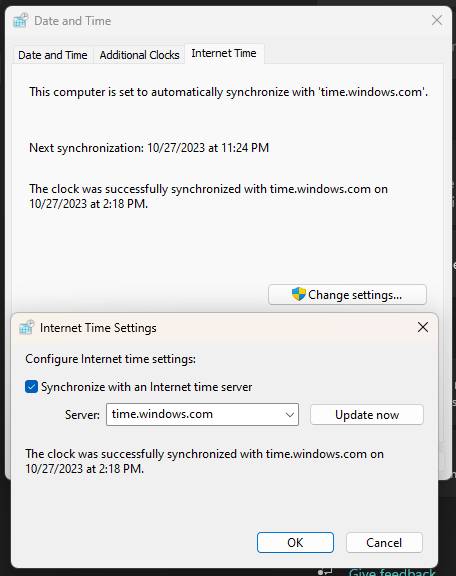
- In the next window, click on the Internet Time tab.
- Select Change settings.
- When the User Account Control window appears, select Yes.
- Pick another server from the dropdown menu.
- Click Update now and then OK.
Manually Adjust Date and Time
If automatic settings fail, you can manually adjust the date and time.
- Navigate to the Date & Time settings.
- If it’s turned on, switch off the Set time automatically toggle.
- Click on the Change button next to Set the date and time manually.
- Set the accurate date and time for your system.
- If needed, disable the Set time zone automatically toggle.
- In the Time zone setting, choose the correct time zone based on your location.
Use the System File Checker Tool
You may try running the SFC (System File Checker) scan. It’s a built-in Windows utility designed to examine and fix system files that might be corrupted or missing. It’s a useful tool for resolving various system issues. Here’s how to run the SFC scan:
- Press Windows key + X.
- Choose Command Prompt (Admin).
- In the Command Prompt window, type sfc /scannow and press Enter.
- The scan will start, it can take some time to complete.
- Once the scan finishes, it will display a message about the scan results.
Additional Troubleshooting
In some cases, your system time might get disrupted by third-party software or malware. To make sure your computer is safe from malware, run a trusted antivirus scan.
Another step to consider is updating your Windows operating system to the latest version. Updates often include fixes for various issues, including those related to your system time.
Check CMOS Battery
If you constantly find your computer’s clock going out of sync, it’s a signal that the CMOS battery might be losing its strength. It’s a small, coin-shaped battery located on the computer’s motherboard. It’s responsible for retaining essential system information, including the date and time.
Consider changing the CMOS battery. If the problem persists even after you change the battery, it means there might be something else causing the problem.
Conclusion
Having the right time on your Windows is crucial. It helps you stay organized, manage your data, and keep things secure. We hope that the tips we’ve shared in this article helped you fix time on Windows 11. If you’ve tried the above steps and still can’t fix the issue, it might be time to reach out to Microsoft’s support team for additional help.